zeiss.jpg

To learn more on the combined use of CMMs with optical probes

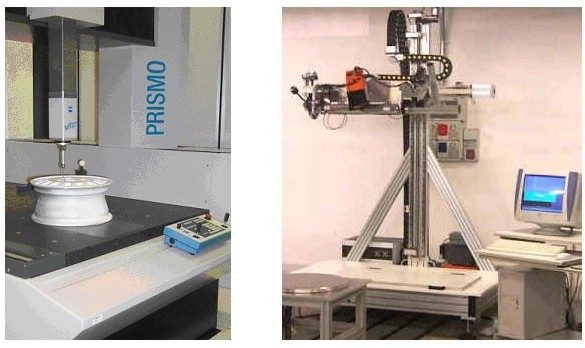
The 3D Vision system used during the experimentation was the prototype 3D-Optolab, and the CMM was the Zeiss Prismo Vast 7D, equipped with the software Holos, installed at the DIMEG Metrological Laboratory. Both are shown in Fig. 1.

The proposed methodology does not foresee the physical integration of the two sensors; instead, their combination at the level of the measurement information is carried out, in a module for the intelligent aggregation of the information coming from the sensors.

Fig. 1 - The Zeiss Prismo Vast 7D (left) and the 3D-Optolab prototype (right) used for the project.

Fig. 2 schematically presents the method. The starting point is the acquisition of a number of clouds of points using 3D-Optolab. These are then imported into the CAD environment PRO/ENGINEER. The initial “rough” CAD model of the surface is obtained by using the modules available in the CAD environment PRO/E. This model is used to “feed” the CMM in the contact, accurate digitization step. The a-prori knowledge of a “rough” description of the surface allows an efficient programming of the scanning and digitizing path, and reduces the number of touch points and of the iterations needed to achieve the complete digitization of the object. The methods was tested on a number of objects: the experimental results are presented and discussed in the related publications at the bottom of the page.

Fig. 2 - Scheme of the developed procedure.

This research activity has been further developed in the frame of the project “Development of a novel methodology for the reverse engineering of complex, free-form surfaces, combining three-dimensional vision systems and Coordinate Measuring Machines” funded by the Italian Ministry of Research, in the year 2000. Two further Laboratories participate to this project: the DIMEG Metrological Laboratory, University of Padova, and the 3D Vision Group located at the Dipartimento di Elettronica e Informatica of the Milan Polytechnic. The objectives of this work are well described by the scheme in Fig. 3.
Fig. 3 - Objectives of the research work in a work-flow fashion.

Optical RE

The first aim of the project, (“Optical RE” in the Fig. 3) is to optimize the RE process as far as the time of execution, by creating a 3D model for the description of the object under test by using the optical digitization. This objective has been performed in the following steps:
  1. development of a reliable and easy to use optical digitizer, able to generate 3D point clouds that describe various parts of the object, each from a specific viewpoint; the measurement system, should be easily movable in space, in order to be able to “observe” the target object from different perspectives, and to create a set of point clouds that completely describe the object itself;
  2. development of procedures for the registration of the point clouds;
  3. development of the procedures for the creation, starting from the registered views, of 3D models of the shapes;
  4. metrological validation of the models by means of the CMM.

Optical/Contact RE

The second purpose of the project (“Optical/Contact RE” in Fig. 3) is to optimize the RE process from the viewpoint of the accuracy of the representation of the object, without increasing the process time. The approach is close to that one represented in Fig. 2; however, the initial representation of the CAD model has to be obtained starting from the above mentioned 3D models.

Metrological validation of Point Clouds

The third purpose of the project (“Metrological validation of point clouds” in the Fig. 3) is closely related to the activity aimed at metrologically validating, by means of the CMM, the point clouds generated by the optical digitizer.

Validation for RP

The final goal of the project (“Validation for RP” in Fig. 3) is the verification of the suitability of the 3D models for the Rapid Prototyping process.

Results obtained

The activity carried out by our Laboratory resulted in two research products. The former is the optical digitizer OPL-3D. The design and the development of the instrument have been completely performed by the Laboratory. The metrological characterization has been performed in collaboration with the Laboratory located in Padova.
The latter is a suite of software tools for the alignement of the point clouds in the multi-view acquisition process. These tools perform, in a semi-automatic way, the estimate of the rototranslation matrixes between pairs of point clouds. A further improvement is performed by the research Laboratory located in Milan, basically aimed at achieving a completely automatic process. Below you can find more details about the procedures.

Relevant Publications

Carbone, V.; Carocci, M.; Savio, E.; Sansoni, G.; De Chiffre, L. “Combination of a Vision System and a Coordinate Measuring Machine for the Reverse Engineering of Freeform Surfaces“, The International Journal of Advanced Manufacturing Technology, Vol. 17, no. 4, pp. 263–271. 2001

Sansoni, G.; Patrioli, A. “Combination of optical and mechanical digitizers for use of reverse engineering of CAD models“, Proceedings of Optoelectronic Distance Measurements and Applications (ODIMAPIII), pp. 301-306. 2001

Sansoni, G.; Carocci, M. “Integration of a 3D vision sensor and a CMM for reverse engineering applications“, Italy-Canada Workshop on 3D Digital Imaging and Modeling Applications of Heritage, Industry, Medicine & Land. 2001

Sansoni, G.; Carmignato, S.; Savio, E. “Validation of the measurement performance of a three-dimensional vision sensor by means of a coordinate measuring machine“, Proceedings of the 21st IEEE Instrumentation and Measurement Technology Conference, Vol. 1, pp. 773-778. 2004

ferrari_punti.jpg

To learn more on 3D Vision applications in the automotive industry

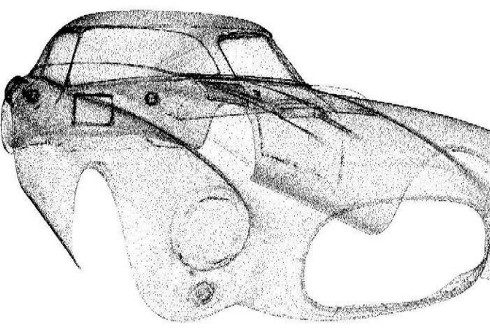
The work performed on the Ferrari presents a number of similarities with respect to the work performed on the Winged Victory: it included the 3D optical digitization of the car, and the generation of a number of polygonal and CAD models.

Fig. 1 shows a view of the whole point cloud obtained by aligning and merging 280 partial point clouds. The step has been performed with the help of suitable markers placed on the surface, given the dramatic regularity of the shapes, and the need to keep the alignment error as lower as possible. Moreover, a skeleton of few, large views (550 x 480 mm), with height resolution of 0.2 mm and measurement variability of 0.1 mm has been obtained in the first step. Then, smaller views (370 x 300 mm), with resolution of 0.1 mm and measurement error of 0.06 mm, have been acquired and merged together using the skeleton as the reference.

Fig. 1 - Complete point cloud obtained after the alignment of the different views.
The multi-view alignment and the creation of the triangle model at high resolution have been performed by using the PolyWorks software. Then, the mesh has been saved in the STL format and imported into the Raindrop Geomagic Studio environment. Here, the triangles have been edited, topologically checked, and decimated at different levels of compression, mainly using only the automatic tools embedded in the software. Fig. 2 shows one of the most dense models obtained (1.5 million of triangles), while Fig. 3 depicts the model obtained after the compression of the previous one down to 10.000 triangles: despite the high compression here applied, the model presents a high level of adherence to the original measured data, thanks to the overall “smoothness” of the car surface.
Fig. 2 - Dense model obtained by the point cloud.

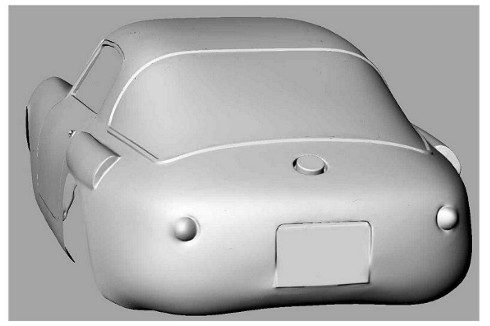
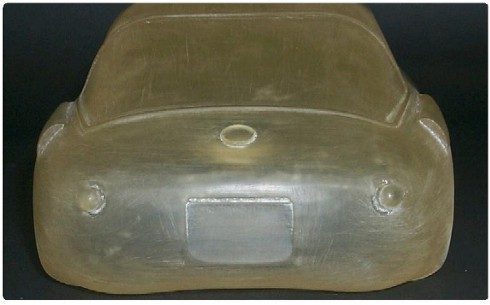
As the last step, the CAD model has been created starting from the triangle mesh of Fig. 2, with minimum intervention of the operator. Fig. 4 shows the rendering of this model (the IGES format is used, resulting in a 120 MB file). The prototype of the car has been obtained at the Laboratory of Fast Prototyping of the University of Udine. The process involved the stereo lithography technique. Similarly to the prototyping of the head of the Winged Victory it resulted into the 1:10 scaled reproduction shown in Fig. 5.

retro_ferrari.jpg
Fig. 4 - CAD model obtained rendered by the software.
prototipo_ferrari.jpg
Fig. 5 - The prototype obtained by fast prototyping. Dimension: 370 x 150 x 90 mm; Material: CIBATOOL SL 5190.

To learn more on the Winged Victory of Brescia

The following sub-sections give an idea of the steps performed to carry out the project, and briefly present the results.

STEP 1: THE ACQUISITION OF THE POINT CLOUDS

Fig. 1 shows the point clouds acquired in correspondence with the head of the statue. Following the requirement of the archaeologist staff, the digitizer has been configured to acquire at the highest resolution, even at the expense of a considerable number of views and of an increased complexity of the alignment process. In the figure, 41 views are shown after the alignment (performed in means of the PolyWorks IM_Align module). Each one is characterized by a lateral resolution of 0.2 mm, and a height resolution from 0.1 mm to 0.3 mm, depending on the quality of the measurement. The measurement error spans from 0.050 mm to 0.2 mm: this variability mainly depends on the colour of the surface and on the presence of numerous undercuts, holes, and shadow regions.

The body of the statue has been acquired at lower resolutions, depending on the different body segments. Special care has been taken to avoid misalignment between the views, especially considering that the registration process was very complex, due to the high number of point clouds (more than 500) needed to fully digitize the statue. The measurement was performed in two steps: in the former, the skeleton was acquired (few, large views at low resolution, along suitable paths around the statue), to minimize the alignment error. In the latter, a high number of small views was captured and aligned to the skeleton. At the end of the process, the skeleton was eliminated.
Fig. 1 - Point cloud obtained of the head of the statue, very dense of details.

STEP 2: THE CREATION OF THE TRIANGLE MODELS

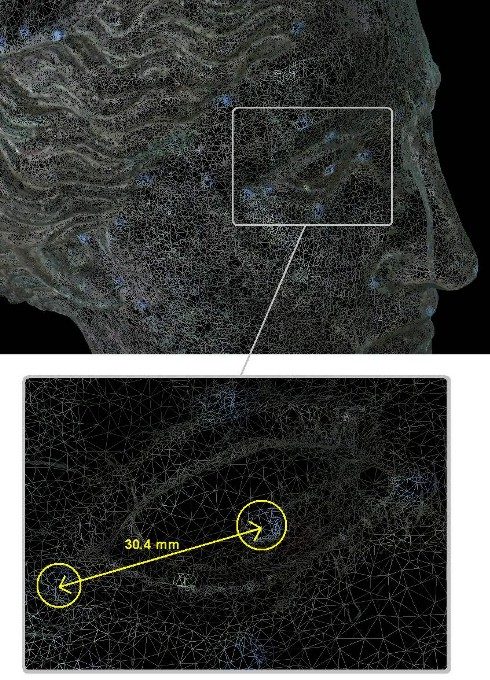
The IM_Merge module of Polyworks has been used to generate the polygon model from the measured data. Preliminarily, proper filteringdecimation and fusion of the partial views were carried out. Models characterized by different levels of adherence to the original point cloud have been created. Fig. 2 shows that one at the highest accuracy that has been used by the archaeologists to perform the measurements between the pairs of fiduciary points.

The measurement is very easy: the operator only selects on the display the two triangles representative of the fiduciary points and the software automatically evaluates and displays the corresponding distance. The measurement is very precise, due to (i) the high quality of the original data, (ii) the availability of the colour information acquired with the range data, and (iii) the density of the triangles within each single marker, as highlighted in the zoom of the figure. 
vittoria_wire.jpg
Fig. 2 - High accuracy section of the head with a zoom of the eye. The measurment is very precise!

STEP 3: THE EDITING OF THE TRIANGLE MODELS

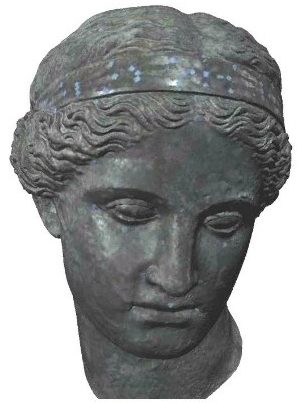
The Polyworks IM_Edit module was very useful for the editing of the triangle models. The objective was to eliminate holes, and in general all the topological irregularities deriving from the invalid measured data. As an example, Fig. 3 shows the appearance of the high-resolution triangle model of the head before the editing operation, while Fig. 4 shows the edited mesh obtained: it is easy to note how all the holes disappeared, resulting in a very appealing rendering of the surface. This model, when the colour information is added, as in Fig. 5, is suited also for applications different with respect to the original, metrological one. These are, for example, the virtual musealization of the statue, and the creation of a topologically closed STL model, that allows us the creation of the copy of the statue.
vittoria_modello_testa.jpg
Fig. 5 - The head of the Winged Victory with the colour information added on top of the mesh.

STEP 4: THE CREATION OF SCALED REPRODUCTIONS OF THE STATUE

This step has resulted in the achievement of a number of copies of the Winged Victory. In Fig. 6 the 1:8 scaled copy of the head of the statue is shown. The work has been accomplished in the framework of the collaboration between our Laboratory and the Laboratory of Fast Prototyping of the University of Udine. A rapid prototyping machine has been used to produce the model, by means of the stereo lithography technique. The CIBATOOL SL 5190 has been used as the material. The overall dimension of the prototype is 140 x 110 x 133 mm. The memory occupation of the original STL file was 10MB: it has been sent via internet to the Laboratory located in Udine. The time required to obtain the copy was 0.20 hours for the elaboration of the data, plus 15 hours for the prototypization.

Fig. 6 - The prototyped models of the Winged Victory head, before and after the colour application on top.

A suite of copies of the whole statue has been obtained in the framework of the collaboration between the Direzione Civici Musei di Arte e Storia of Brescia and the EOS Electro Optical Systems GmbH, located in Munich, Germany. The work led to the development of two 1:1 scaled copies of the statue have been produced. For them, the Laboratory has provided the high resolution STL file shown in Fig. 7 (16 millions of triangles).

The model was segmented into sub-parts, that were separately prototyped. Fig. 8 shows the copy of the statue that is currently placed in the hall of EOS gmbh, Robert-Stirling-Ring 1, 82152 Krailling Munchen DE.

Further experimentation dealing with the generation of the mathematics of the surfaces has been carried out. Obviously, we did not want to “redesign” the shape of the statue: instead, the objective was to verify the feasibility of the generation of the CAD model of the surfaces, in view of its use mainly in two applications. The former is the reconstruction of lost parts (for example, the fingers of the hands), the latter is the virtual modification of the relative position of sub-parts of the body. For example, this is the case of the position of the head of the statue, which seems excessively inclined with respect to the bust.

Step 5: the creation of the CAD models

The feasibility study has been performed on the head. The Raindrop Geomagic Studio 3.1 has been used. The triangle models of these two body segments have been imported as STL files from the PolyWorks suite. The Geomagic environment elaborated them and generated the CAD model in three steps. The first one allowed the determination of the patch layout (in a fully automatic way); the second one automatically identified a proper number of control points within each patch, the third one fitted the NURBS surfaces to the control points. The following figures show the process in the case of the head of the statue. It is worth noting the regularity of the surfaces at the borders of each patch (Fig. 9), the complexity of the CAD model (Fig. 10) and the adherence of the mathematics to the triangle model (Fig. 11).

Fig. 11 - The adherence of the rendered model on the point cloud measured one is really good, as highlighted in the figure.

Study case: nose reconstruction

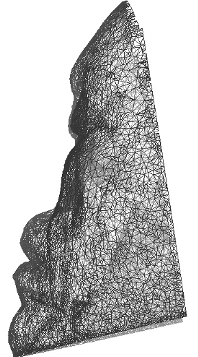
In this page, the application of the method to the case of nasal prosthetic reconstruction is shown. The patient suffered from a total loss of the nose, because of excision of a tumor. The optical 3D laser stripe digitizer Konica Minolta Vivid 910 was used to perform data acquisition. The system was mounted on a tripod and properly oriented to optimize the acquisition view point, as shown in Fig. 1. The whole face was scanned by a eye-safe laser stripe in 0.3 seconds. The corresponding point cloud is shown in Fig. 2.

By means of suitable tessellation, the raw 3D data point were replaced by triangle tessels that maintained the information about the contiguity of the points. The polygon mesh is shown in Fig. 3. A 4 mm thickness was then internally added. The mesh was then saved in a 9 MB STL file, for subsequent prototyping.

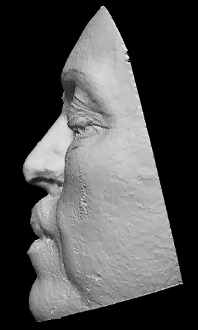
The “sculpured model” of the patient’s face was created. To this aim, a number of healthy “donors” were engaged. The Minolta digitizer was used to acquire at the best resolution the point cloud of their nose. Each mesh was dragged and roughly matched to the reference model, to visually appreciate the appearance of the whole face, and to select the most appealing shape, under the aesthetical point of view. After it was selected, it was carefully positioned onto the reference model. The boundaries were refined and finely blended to the deformity site, to optimize the functionality and the proportions of the prosthesis. The resulting sculpured model is shown in Fig. 4. A 4 mm thickness was externally added, the mesh was then saved in a 11.3 MB STL file.

Then, the physical models were created. Both the STL files were sent through the internet for the RP machining. They were fabricated using the epoxy photo-polymerizing resinSomos Watershed 11120” by the SLA 3500 Prototyping Machine. The RP production was accomplished in about 14 hours. The two physical models are shown in Fig. 5.

The last step was the fabrication of the prosthesis. The conventional wax positive pattern was cast. To perform this task, the two physical models were physically overlapped one to the other and the wax was poured as shown in Fig. 6. The wax pattern was then positioned on the prototype of the reference model as shown in Fig. 7. In this way, it was possible to perform the try-in of the prosthesis and its refinement on this copy, without disturbing the patient. The definitive prosthesis was obtained by conventional flasking and investing procedures. Fig. 8 shows the patient after the positioning of the prosthesis. It was then manually refined on the patient’s face, to match the skin color and texture. This operation was possible thanks to the collaboration with the medical team of the Faculty of Medicine of the University of Brescia and the precious contribution of Dr. Vincenzo Cavallari, technical specialist in facial and dental implants.