Hands-Free v2 to teleoperate robotic manipulators: three axis precise positioning study

HANDS-FREE V2

The idea of this thesis project is to improve the already developed teleoperation system presented at Ubiquitous Robotics by implementing the z-axis control. In fact, the original system only performed a xy teleoperation allowing users to move the end-effector of the robot to the desired position determined by the index finger keypoint extracted by OpenPose. However, a more interesting application also integrates a precise z-axis control and a trajectory planner, which are the key improvements of this version as seen in Fig. 1.

Fig. 1 - Concept of Hands-Free v2. By analyzing the hand skeleton using OpenPose it is possible to extract the index finger position over time to build a complete trajectory. The points are interpolated by the ad-hoc interpolator and the final trajectory is sent to the ROS node of the Sawyer robot.

SETTING UP THE SYSTEM

Due to the COVID-19 pandemic restrictions, this project has been carried out using ROS Gazebo to reproduce the laboratory set-up already seen for Hands-Free v1. The camera adopted is a consumer-end RGB camera that has been calibrated following the standard procedure described in Hands-Free v1 paper. The robot calibration has been similarly performed by setting up a simulated environment as shown in Fig. 2.

Fig. 2 - Example of the robot calibration procedure carried out into the simulated Gazebo environment.

BUILDING THE TRAJECTORY

The trajectory builder is an extension of the capabilities of the old version of the software, hence it only works in 2D considering the user frame (xy plane) and the vertical robot frame (zy plane). The procedure to use this application is the following and may be seen in the video below:

  1. Users place their hand open on the user frame in order to detect the “hand-open” gesture. This allows the system to reset the variables and move the robot to its home pose (Fig. 3)
  2. After the initialization phase, users may move their hand around the user frame performing the “index” gesture (with both thumb and index finger opened). The index finger position is extracted considering keypoint 8. Only positions which differ from the preceding one of at least 5 px are retained. Moreover, each position is extracted as the mean position detected over N consecutive frames. In this case, we set N = 3 (Fig. 4)
  3. The detected trajectory points are filtered and interpolated according to the ad-hoc interpolator developed. The resulting trajectory may be sent to the robot if the “move” gesture is performed (with index and middle fingers opened, see Fig. 5).
Fig. 3 - Example of the initialization phase performed by using the "hand-open" gesture.
Fig. 4 - Example of the definition of a trajectory by performing the "index" gesture. The trajectory points are saved and filtered according to their position with respect to the preceding point.
Fig. 5 - Example of the launch of the interpolated trajectory, performed by using the "move" gesture.

Z-AXIS CONTROL

To control the manipulator along the z-axis (which in this set-up corresponds to the robot’s x-axis) three different modalities have been studied and implemented. For now, however, the depth control is still separate from the trajectory planner.

KEYBOARD

Intuitively, by using this mode the robot may be moved home (h), forward (w), or backward (s) according to the pressed key of the keyboard. The stepsize of its movement is fixed. By pressing ctrl+c or esc it is possible to exit the modality and close the communication with the robot.
 

FINGERS DISTANCE

In this modality, the core functions of Hands-Free are retained in order to detect the hand gestures. However, in this case, only the “hand-open” gesture and the “move” gesture are detected. By checking the mutual distance between the two fingers of the “move” gesture it is possible to detect if the robot should move forward (small distance up to zero) or backward (higher distance, corresponding to the original “move” gesture with the two fingers quite separate from each other). An example of this modality may be seen in the video below.
 

KAI SENSOR

The last modality implements depth control by leveraging the Vicara Kai wearable sensor. The sensor should be wear on the hand and, according to the detected orientation of the opened hand, it is possible to determine if the robot should stay still (hand parallel to the ground), move forward (hand tilted down), or backward (hand tilted up).

RELATED PUBLICATION

C. Nuzzi, S. Ghidini, R. Pagani, S. Pasinetti, G. Coffetti and G. Sansoni, “Hands-Free: a robot augmented reality teleoperation system,” 2020 17th International Conference on Ubiquitous Robots (UR), Kyoto, Japan, 2020, pp. 617-624, doi: 10.1109/UR49135.2020.9144841.

Analysis and development of a teleoperation system for cobots based on vision systems and hand-gesture recognition

THE IDEA

The idea behind this thesis work is to make a first step towards the development of a vision-based system to teleoperate cobots in real-time using the tip of the user’s hand.

This has been experimentally done by developing a ROS-based program that simultaneously (i) analyzes the hand-gesture performed by the user leveraging OpenPose skeletonization algorithm and (ii) moves the robot accordingly.

EXPERIMENTAL SET-UP

After the Kinect v2 sensor has been intrinsecally calibrated to perfectly align the depth data to the RGB images, it is necessary to calibrate the workspace, hence establishing a user frame reference system in order to convert from image pixels to meters and vice-versa.
 
This has been done by adopting the vision library OpenCV. By using its functions it has been possible to detect automatically the master’s markers and assigning to each of them the corresponding coordinates in the user reference system. Hence, given the couples of points in the user frame and in the camera frame, it has been possible to estimate the calibration matrix M by solving the linear system using the least squares method.
 
In Fig. 1 the experimental set-up of the camera-user frame portion of the project is presented.
Fig. 1 - Experimental set-up. The horizontal user frame is viewed by a Kinect v2 camera mounted at fixed height.

CALIBRATION ANALYSIS

First test

In this test a rectangular object of shape 88 x 41 x 25 mm has been positioned in correspondence of 8 measure points of the set-up as shown in Fig. 2 by placing its bottom-left corner in the measure point. 

The measured position of the object in each point has been calculated by applying the conversion from pixels to meters developed before. Hence, it has been possible to estimate the positional error as the difference between the measured position and the real position of the bottom-left corner of the object in each pose.
 
From the results of this analysis it emerged that the average displacement for the two coordinates is equal to 6.0 mm for the x-axis and 5.8 mm for the y-axis. These two errors are probably caused by the prospectic distortions of the lenses and by the scene illumination. In fact, since the calibration performed did not consider the lens distortions, their effect affects the measurements especially around the corners of the image. Moreover, the height of the object casts shadows on the set-up that introduce errors in the corner detection due to the mutual position of the light and the object.
 

SECOND TEST

Similarly to the first test, in this one a rectangular object of shape 73 x 48 x 0.5 mm has been positioned in correspondence of the 8 measure points.

In this case the average displacement observed is equal to 6.4 mm for the x-axis and 6.5 mm for the y-axis. This highlighted how the prospectic distortions heavily affect the measurements: in fact, since the height of the object is not enough to cast shadows on the plane, these errors are only due to the lens distortions.

Fig. 2 - Measure points of the calibration master adopted. The reference system is centered around the bottom-left marker (marker 0) of the target.

DEVELOPED GESTURES

Since the system adoperates OpenPose to extract in real-time the hand skeleton, it has been necessary to define three hand-gestures to detect according to the position of the keypoints (see Fig. 3, Fig. 4 and Fig. 5).

However, since OpenPose estimates the hand keypoints even if they are not present, it has been necessary to define a filtering procedure to determine the output gesture according to some geometrical references:

  • the thumb must be present to correctly assign the keypoints numbers
  • the distance between the start and end keypoint of the thumb must be between 20 and 50 mm
  • the angle between the thumb and the x-axis must be > 90°
  • the distance between the start and end keypoints of index, middle and ring fingers must be between 20 and 100 mm
  • the distance between the start and end keypoint of the pinky finger must be between 20 and 70 mm
Moreover, the acquisition window has been set to 3 s in order to take into account the time intervals between a change of hand gesture or a movement.
Fig. 3 - Hand-gesture of the first sub-task named "positioning".
Fig. 4 - Hand-gesture of the second sub-task named "picking".
Fig. 5 - Hand-gesture of the third sub-task named "release".

GESTURES ANALYSIS

The proposed gestures have been performed by three male students with pale skin in different moments of the day (morning, afternoon, late afternoon). The purpose of this test was to determine if the system was able to robustly detect the gestures also considering the illumination of the scene.

The students moved their hand around the user frame and performed the gesture one at a time. I resulted that, on average, the proposed gestures were recognized 90% of the times.

It is worth noting that gesture “positioning” was defined in such a way to reduce the misclassification of the keypoints that could happen in some cases due to the presence of only one finger (the index). In fact, it has been observed that incrementing the number of fingers clearly visible in the scene also incremented the recognition accuracy of the gesture. This is probably due to the fact that the thumb must be present to avoid misclassifications with the index finger. However, even if the “positioning” gesture adopts three fingers, only the position of the index finger’s tip (keypoint 8) is used to estimate the position to which the user is pointing to.

COMPLETE TELEOPERATION SYSTEM

The complete system is composed by (i) the gesture recognition ROS node that detects the gesture and (ii) a robot node to properly move the Sawyer cobot accordingly. Hence, since the robot workspace is vertical (as shown in Fig. 6) it has been necessary to properly calibrate the vertical workspace with respect to the robot user frame. This has been done using a centering tool to build the calibration matrix (adopting points couples of robot frame coordinates – vertical workspace coordinates).

Fig. 6 - Complete set-up developed, showing the two workspaces (horizontal and vertical).

Deep Learning in the kitchen: development and validation of an action recognition system based on RGB-D sensors

This thesis work is part of a research project between the Laboratory and Cast Alimenti cooking school. Cast Alimenti aims to obtain a product to improve teaching in its classrooms. The idea is to develop a system (hardware and software) that simplifies the process of writing recipes while the teacher performs its lecture in the kitchen. The project aims to translate into written language a recipe performed during the demonstration lessons, allowing also to write in Italian the lessons performed by foreign teachers. This goal has been achieved through the use of an action recognition system.

Action recognition aims to interpret human actions through mathematical algorithms and is based on the identification and tracking of the position of the human body in time. The topic is actively studied in various fields, in fact, by using this technique, devices such as smart bands and cell phones may recognize if a person is stationary, walking or running. Another example is related to security cameras and systems, in which the recognition of actions that may be considered violent or dangerous allow the authorities to intervene quickly when necessary.

The project is divided into several phases. First, it is necessary to implement the recognition of the cook’s activity during the practical demonstration and later, based on the recognized actions, it is necessary to automate the writing of the recipe. This thesis work is focused on the first part of the project, in particular on the choice of the mathematical algorithm necessary for the recognition of actions 

THE SCENARIO: THE “SMART” KITCHEN

For a complete understanding of the difficulties of application of the system under development, it is necessary to contextualize the environment in which it will work. The scenario is that of an open kitchen in which the cook works behind a counter and for most of the time is in the same position and only its upper body is visible (Fig. 1). The cook interacts with the various working tools and food only through the upper limbs and there is no interaction with other subjects. 

The kitchen changes as the recipe progresses, as work tools such as stoves, mixers, pots and pans and other utensils are added and removed as needed. The predominant colors of the scene are white (the cook’s uniform, the wall behind him, the cutting board) and steel (the worktop and equipment). This results in uneven lighting and the creation of reflections and shadows. The presence of machinery and heat sources generates both auditory and visual noises, especially in the infrared spectrum. In the working environment there are also other critical issues such as: the presence of water, steam, temperature changes, substances of various kinds such as oil and acids, as well as chemicals for cleaning. 

To obtain reliable data in this context it is necessary to use appropriate instrumentation, with specific technical characteristics.

Fig. 1 - Example of the "smart" kitchen used in this work at Cast Alimenti. The predominant colors are white and gray and the overall luminance is dark. Due to the characteristics of the scenario the instrumentation of choice must be carefully selected.

technology of choice for action recognition

Tracking is the first step in action recognition. The technology used for this project was carefully selected by evaluating the systems used commercially to track full-body movements, such as accelerometers and gyroscopes, RGB cameras and depth sensors (3D cameras). 

Wearable solutions involve the use of accelerometers coupled with gyroscopes, a technique adopted in almost all commercially available smart bands for sports performance assessment and sleep monitoring. However, to properly use such wearable devices in this project it means that the cook must be equipped with sensors applied to the hands or wrists and the data obtained from them should be synchronized with each other. Considering the scenario in which the cook operates, it is also necessary that the sensors are waterproof and resistant to aggressive substances.

Optical instrumentation, such as RGB or 3D cameras positioned externally to the scene, makes it possible to keep the image sensors away from the chef’s workspace, thus avoiding exposure to the critical environmental conditions of the kitchen. A disadvantage of this solution is the huge amount of images obtained and the related processing. However, the computational power of modern computer systems allow their application in real-time systems.

Given the environmental conditions and the need of making the acquisition system easily accessible to non-expert users, we opted for the second solution choosing to place the cameras in front of the cook who performs the recipe, thus replicating the view of the students during the lectures.

Fig. 2 - Example taken from the experimental set-up. The two Kinect v2 cameras have been positioned in front of the kitchen counter, replicating the students' view.

WHAT IS AN ACTION?

An action is any movement made by the operator in which tools are used to obtain a certain result. Characteristics of an action are (i) the speed of execution and (ii) the space in which it takes place. Based on these variables, it is important to select an appropriate frame rate and sensor resolution.

Recognizing the performance of actions through a mathematical algorithm that analyzes images is not a computationally simple task, because the computational load increases proportionally to the number of frames per second and to the image resolution. It is therefore crucial to find the optimal configuration in order to maintain a good image quality, which is necessary to recognize the action, while still being able to use a consumer processing system.

Modern consumer computing systems (PCs) currently provide sufficient computational power to perform the necessary calculations by harnessing the power of parallel computing in GPUs (graphics processing units).

DEEP LEARNING FOR ACTION RECOGNITION

There are several algorithms available to analyze actions in real time given a set of image frames temporally consistent. They may be subdivided into two main categories:

  • Algorithms that analyze 3D images, such as images generated using depth cameras. This type of data removes all issues related to the color composition of the scene and subjects that may be blurred or that vary during the execution (Fig. 3 a); 
  • Algorithms that process Skeleton data, in which an artificial skeleton composed of keypoints corresponding to the fundamental joints of the body is computed by the network. The keypoints represent (x, y, z) positions of the body’s joints in the camera reference system  (Fig. 3 b). 

Moreover, by combining the two categories it is possible to obtain hybrid algorithms that analzye both types of data.

Among the broad set of algorithms available two of them have been selected for this work:

  1. HPM+TM: it is a supervised classification algorithm developed in MATLAB by the University of Western Australia. It was created specifically for action recognition and has achieved the best performance in the 3D Action Pairs dataset, reaching an accuracy of 98%.
  2. indRNN: this model was developed as part of a collaboration between Australia’s University of Wollongong and the University of Electronic Science and Technology of China. Although the algorithm has not been specifically designed for action recognition, it is still applicable where it is necessary to recognize features over time. It is a supervised classification algorithm and obtained an efficiency of 88% in the NTU RGB+D Dataset.
Fig. 3 - Example of data that may be processed by deep learning models. (a) Image frame in RGB on which skeletal data is drawn; (b) depth frame taken from Kinect v2 cameras.

THE ACTIONS DATASET OBTAINED

The experimental campaign took place during two days at Cast Alimenti cooking school. Two Kinect v2 cameras recorded Nicola Michieletto, the chef that worked with our Laboratory since the beginning of the project, while he cooked lasagne. The entire preparation was repeated and filmed twice, this with the aim of obtaining a larger and more representative dataset.

From a first analysis, it is made evident that some actions were repeated much more than others. This strong difference in the number of samples available forced us to make some preliminary analysis in order to understand how the presence of categories with a small number of samples influences the accuracy of the algorithm adopted. 

Therefore, we selected only a sub-sample of the actions present in the dataset, namely:

  1. stirring: using a ladle the cook mixes the ingredients inside a pot or a bowl with circular movements;
  2. pouring: the cook takes an ingredient from one container and pours it inside another container;
  3. rolling out the pasta: a process in which pasta is made flat and thin using an inclined plane dough sheeter. The cook loads a thick sheet from the top of the machine and pulls out a thinner sheet from the bottom;
  4. cutting: the cook cuts a dish by means of a kitchen knife; the dish is held steady with the left hand and the knife is used with the right hand;
  5. placing the pasta: the cook takes the pastry from the cloths on which it was put to rest and deposits it inside the pan where he is composing the lasagna;
  6. spreading: process by which the béchamel and Bolognese sauce are distributed in an even layer during the composition of the lasagna;
  7. sprinkling: the cook takes the Parmesan grated cheese and distributes it forming an even layer;
  8. blanching: a process in which the cook takes freshly flaked pasta from the counter and plunges it inside a pot with salted water for a brief cooking time;
  9. straining the pasta: with the use of a perforated ladle the cook removes the pasta from the pot in which it was cooking and deposits it in a pan with water and ice;
  10. draining the pasta on cloth: the cook removes with his hands the pasta from the water and ice pan and lays it on a cloth in order to allow it to dry;
  11. folding the pasta: during the puffing process it is sometimes necessary to fold the pasta on itself in order to proceed to a further puffing process and obtain a more uniform pasta layer;
  12. turn on/off induction plate: the cook turns on or off a portable induction plate located on the work counter;
  13. catching: simple process where the cook grabs an object and moves it closer to the work point;
  14. moving pot: the cook moves the pot within the work space, in most cases involves moving it to or from the induction plate.
Fig. 4 - Examples of the 14 actions selected for the work. (a) stirring, (b) pouring; (c) rolling out the pasta; (d) cutting; (e) placing the pasta; (f) spreading; (g) sprinkling; (h) blanching; (i) straining the pasta; (l) draining the pasta on cloth; (m) folding the pasta; (n) turn on/off induction plate; (o) catching; (p) moving pot.

ANALYSIS

We performed a detailed analysis to determine the performances of the two algorithms according to (i) a reduction of the number of classes and (ii) an increase of the number of samples per class. Albeit theoretically known that deep learning algorithms improve the more data are used and that a high number of classes presenting similarities between each other reduce the overall inference accuracy, with this test we wanted to quantify this phenomenon.

In summary, the results for each algorithm are:

  • HPM+TM: this algorithm performs better when less classes are adopted and a high number of samples per class is used. Highest accuracy achieved: 54%
  • indRNN: this model performs better than the other one and is more robust even if less samples per class are used. Moreover, no significant improvements can be observed by reducing by more than a half the number of classes. Highest accuracy achieved: 85%
Moreover, by observing the resulting confusion matrixes it is possible to note that “stirring” and “pouring” classes are the most critical. In fact, the highest number of false positives is obtained for the “stirring” class while the highest number of false negatives is observed for the “pouring” class. The two cases are often due to misclassifications between each other. This highlighted the fact that during the cooking procedure the chef often poured an ingredient while stirring the pot with the other hand, hence the two actions are more often than not overlapping. Hence, it would be best to merge the two classes into one to account for this eventuality.

Extrinsic Calibration procedure by using human skeletonization

Metrology techniques based on Industrial Vision are increasingly used both in research and industry. These are contactless techniques characterized by the use of optical devices, such as RGB and Depth cameras. In particular, multi-camera systems, i. e. systems composed of several cameras, are used to carry out three-dimensional measurements of various types. In addition to mechanical measurements this type of systems are often used to monitor the movements of human subjects within a given space, as well as for the reconstruction of three-dimensional objects and shapes.

To perform an accurate measurment, multi-camera systems must be carefully calibrated. The calibration process is a fundamental concept in Computer Vision applications that involve image-based measurements. In fact, Vision System calibration is a key factor to obtain reliable performances, as it allows to find the correspondence between the workspace and the points present on the images acquired by the cameras.

A multi-camera system calibration is the process that allows to obtain the geometric parameters related to distortions, positions and orientations of each camera that constitutes the system. It is therefore necessary to identify a mathematical model that takes into account both the internal functioning of the device and the relationship between the camera and the external world.

The calibration process consists of two parts:

  1. The intrinsic calibration, necessary to model the individual devices in terms of focal length, coordinates of the main point and distortion coefficients of the acquired image;
  2. The extrinsic calibration, necessary to determine the position and orientation of each device with respect to an absolute reference system. By means of extrinsic calibration it is possible to obtain the position of the camera reference system with respect to the absolute reference system in terms of rotation and translation.
Traditional calibration methods are based on the use of a calibration target, i. e. a known object, usually a plane object, on which there are calibration points that are unambiguously recognizable and have known coordinates. These calibration targets are automatically recognized by the system in order to calculate the position of the object with respect to the camera and thus obtain the parameters of rotation and translation of the camera with respect to the global reference system (Fig. 1).
Fig. 1 - Examples of traditional calibration masters.

The methods based on the recognition of three-dimensional shapes are based on the geometric coherence of a 3D object positioned in the field of view (FoV) of the various cameras. Each device records only a part of the target object and then, combining each view with the portion actually recorded by the camera, the relative displacement of the sensors with respect to the object is evaluated, thus obtaining the rotation and translation of the acquisition device itself (Fig. 2).

Fig. 2 - Example of a known object used as the calibration master, in this case a green sphere of a known diameter.

However, both traditional calibration methods and those based on the recognition of three-dimensional shapes have the disadvantage of being very complex and computationally expensive. In fact, former methods exploit the use of a generally flat calibration target which limits the positioning of the target itself because, under certain conditions and positions, it is not possible to obtain simultaneous views. The latter methods also require to converge to a solution, hence a good initialization of the parameters of 3D recognition by the operator is needed, resulting in low reliability and limited automation.

Finally, the methods based on the recognition of the human skeleton use as targets the skeleton joints of the human positioned within the FoV of the cameras. Skeleton based methods represent therefore an evolution of the 3D shape matching methods, since the human is considered as the target object (Fig. 3).

In this thesis work, we exploited skeleton based methods to create a new calibration method which is (i) easier to use compared to known methods, since users only need to stand in front of a camera and the system will take care of everything and (ii) faster and computationally inexpensive.

Fig. 3 - Example of a skeleton obtained by connecting the joints acquired from a Kinect camera (orange dots) and from a calibration set up based on multiple cameras (red dots).

STEP 1: Measurment set-up

The proposed set-up is very simple, as it is composed of a pair of Kinect v2 intrinsecally calibrated by using known procedures, a process required to correctly align the color information on top of the depth information acquired by the camera.

The cameras are placed in order to acquire the measurment area in a suitable way. After the calibration images have been taken, these are evaluated by a skeletonization algorithm based on OpenPose, which also takes into account the depth information to correctly place the skeleton in the 3D world [1]. Joints coordinates are therefore extracted for every pair of color-depth images correctly aligned both spatially and temporally.

To obtain accurate joint positions we also perform an optimization procedure afterwards to correctly place the joints on the human figure according to a minimization error procedure written in MATLAB.

Fig. 4 shows the abovementioned steps, while Fig. 5 shows a detail of the skeletonization algorithm used.


Fig. 4 - Steps required for the project. First we acquire both RGB and Depth frames from every Kinect, second we perform the skeletonization of the human using the skeletonization algorithm of choice and finally we use it to obtain the extrinsinc calibration matrix for each kinect, in order to reproject them to a known reference system.
Fig. 5 - Skeletonization procedure used by the algorithm.

STEP 2: Validation of the proposed procedure

To validate the system we used a mannequin placed still in 3 different positions (2 m, 3.5 m, 5 m) showing both the front and the back of it to the cameras. In fact, skeletonization procedures are usually more robust when humans are in a frontal position since also the face keypoints are visible. The validation positions are shown in Fig. 6, while the joint positions calculated by the procedure are shown in Fig. 7 and 8.

Fig. 6 - Validation positions of the mannequin. Only a single camera was used in this phase.
Fig. 7 - Joints calculated by the system when the mannequin is positioned in frontal position at (a) 2 m, (b) 3.5 m and (c) 5 m.
Fig. 8 - Joints calculated by the system when the mannequin is positioned in back position at (a) 2 m, (b) 3.5 m and (c) 5 m.

STEP 3: Calibration experiments

We tested the system in 3 configurations shown in Fig. 9: (a) when the two cameras are placed in front of the operator, one next to the other; (b) when a camera is positioned in front of the operator and the other is positioned laterally with an angle between them of 90°; (c) when the two cameras are positioned with an angle of 180° between them (one in front of the other, operator in the middle).

We first obtained the calibration matrix by using our procedure, hence the target used is the human subject placed in the middle of the scene (at position zero). Then, we compared the calibration matrix obtained in this way to the calibration matrix obtained from another algorithm developed by the University of Trento [2]. This algorithm is based on the recognition of a 3D known object, in this case the green sphere shown in Fig. 2.

The calibration obtained from both methods is evaluated using a 3D object, a cylinder of known shape which has been placed in 7 different positions in the scene as shown in Fig. 10. The exact same positions have been used for each configuration.

Fig. 9 - Configurations used for the calibration experiments.
Fig. 10 - Cylinder positions in the scene.

We finally compared the results aligning the point clouds obtained by using both calibration matrixes. These results have been elaborated in PolyWorks for better visualization, and are shown in the presentation below. Feel free to download it to know more about the project and to view the results!

Gait Phases analysis by means of wireless instrumented crutches and Decision Trees

In recent years there has been a significant increase in the development of walking aid systems and in particular of robotic exoskeletons for the lower limbs, used to make up for the loss of walking ability following injuries to the spine (Fig. 1).

However, in the initial training phase the patient is still forced to use the exoskeleton in specialized laboratories for assisted walking, usually equipped with vision systems, accelerometers, force platforms and other measurement systems to monitor the patient training (Fig. 2).

Fig. 1 - Example of a patient wearing the ReWalk exoskeleton. The crutches are needed as aid for the patients, since they tend to tilt forward when using the exoskeleton.

To overcome the limitations given by both the measuring environment and the instruments themselves needed, the University of Brescia joined forces with other research laboratories and created a pair of instrumented wireless crutches able to assess the loads on the upper limbs through a suitable biomechanical model that measures the load exchanged between the soil and the crutch. 

In addition to providing a great help to the physiotherapist for the assessment of the quality of walking and reduce the risk of injury to the upper limbs due to the use of the exoskeleton, the real advantage of the developed device lies in the fact that it is totally wireless, allowing its use in external environments where the user can feel more comfortable. It is in fact known in the literature that the behavior of a subject during a walk varies depending on the environment in which it is performed, both because of the space limitations and of the range of the measurment instrumentation, which limits the trajectory the patient performs in a laboratory compared to the one performed outdoors without strict limitations.

It is also important to relate and evaluate the measured quantities by averaging them on a percentage basis associated with the phases of the step instead of time, in order to compare them with the physiological behavior of the subject, usually related to the phases of the step (swing and stance, Fig. 3).

Fig. 3 - Detail of a gait cycle: the stance phase is when the foot is placed forward, the swing phase is when the foot kicks off the ground moving the body forward.

STEP 1: Instrumented wireless crutches design

A first prototype of instrumented crutches was already been developed to measure the upper limbs forces. In this project, however, we wanted to create a new prototype able to measure and predict the gait phases without the need of an indoord laboratory. To do this, we mounted two Raspberry Pi on the crutches and two PicoFlexx Time of Flight cameras which will see the feet while walking (Fig. 4 and 5).
Fig. 4 - Detail of the proposed instrumented crutches. The two Raspberry Pi send the acquired images to an Ubuntu PC wireless.
Fig. 5 - (1) PicoFlexx ToF cameras, (2) Raspberry Pi boards, (3) powerbanks for the Raspberry Pi boards.

STEP 2: Supervised Machine Learning algorithm for gait phases prediction

We choose a supervised algorithm (Decision Trees) to predict the gait phases according to the depth images of the feet acquired during the walking.
Each image was processed offline to (i) perform a distance filtering, (ii) calculate and fit a ground plane according to the measured one and (iii) calculate the distance between the ground plane and the feet. The latter values are used as features for the algorithm (Fig. 6 and 7).
Fig. 6 - Detail of the supervised algorithm of choice: a set of features are selected and used for the training of the model, which is then used to predict the gait phases.
Fig. 7 - Detail of the processing of the images needed to extract the features used by the model.

STEP 3: Experiments

The proposed system has been tested on 3 healthy subjects. Each subject has been tested on a walk indoor and on a walk outdoor, different for every subject.

For each subject we trained a model specific for the person. This choice was driven by the fact that every person walks in its way, so it is best to comprehend its specific style and use it to monitor its performances while walking.

To learn more about the project and to view the results, feel free to download the presentation below!

Performance Benchmark between an Embedded GPU and a FPGA

Nowadays is impossible to think of a device without considering it “intelligent” to some extent. If ten years ago “intelligent” systems where carefully designed and could only be used in specific cases (i. e. industry or defense or research), today smart sensors which are big as a button are everywhere, from cellphones to refrigerators, from vacuum cleaner to industrial machines.
If you think that’s it, you’re wrong: the future is tiny.

Embedded systems are more and more needed even in industries, because they’re capable to perform complex elaborations on board, sometimes comparable to the ones carried out by standard PCs. Small, portable, flexible and smart: it is not hard to understand why they’re more and more used!

A plethora of embedded systems is available on the market, according to the needs of the client. One important characteristic to check out is the capability of the embedded platform of choice to be “smart”, which nowadays means if it’s able to run a Deep Learning model with the same performances obtained while running it on a PC. The reason is that Deep Learning models require a lot of resources to perform well, and running them on CPUs usually means to lose accuracy and speed compared to running them on GPUs.

To solve this issue, some companies started to produce embedded platforms with GPUs on board. While the architecture of these systems is still different to the architecture of PCs, they are a quite good improvement on the matter. Another type of embedded systems is the FPGA: these platforms lead the market for a while before embedded GPUs became common, are low-level programmed and because of that are usually high performing.

In this thesis work, conducted in collaboration with Tattile, we performed a benchmark between the Nvidia Jetson TX2 embedded platform and the Xilinx FPGA Evaluation Board ZCU104.

STEP 1: Determine the BASELINE model

To perform our benchmark we selected an example model. We kept it simple by choosing the well-known VGG Net model, which we trained on a host machine equipped with a GPU on the standard dataset CIFAR-10. This dataset is composed by 10 classes of different objects (dogs, cats, airplanes, cars…) with standard image dimensions of 32×32 px.

The network was trained in Caffe for 40000 iterations, reaching an average accuracy of 86.1%. Note that the model obtained after this step is represented in floating point 32bit (FP32), which allows a refined and accurate representation of weights and activations.

Fig. 3 - CIFAR-10 dataset examples for each class.

STEP 2: Performances on Nvidia Jetson TX2

This board is equipped with a GPU, thus allowing a representation in floating point. Even if the FP32 representation is supported, we choose to perform a quantization procedure to reduce the representation complexity of the trained model to a FP16 representation. This choice was driven by the fact that the performances obtained with this representation are considered the best ones by the literature.

We used TensorRT, which is natively installed on the board, to perform the quantization procedure. After this process the model obtained an average accuracy of 85.8%.

STEP 3: Performances on Xilinx FPGA Zynq ZCU104

The FPGA do not support floating point representations. The toolbox used to modify the original model and adapt it for the board is a proprietary one, called DNNDK.

Two configurations were tested: a configuration where the original model was quantized from FP32 to INT8, thus losing the floating point and critically reduce the dimension of the network to few MB. The average accuracy obtained in this case is 86.6%, slightly better than the baseline probably because of the big representation gap, which in some cases lead to correct predictions the ones that were borderline between correct and incorrect.

The second configuration applies a pruning process after the quantization procedure, thus deleting useless layers. In this case the average accuracy reached is of 84.2%, as expected after the combination of both processes.

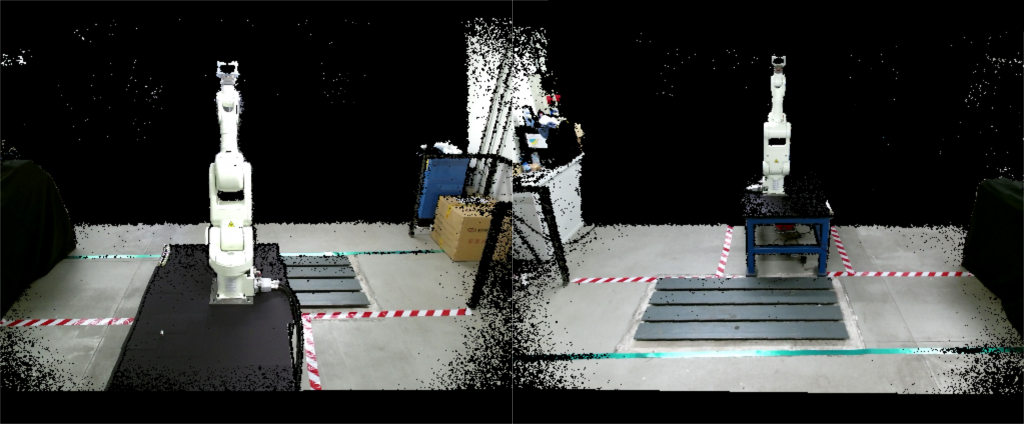
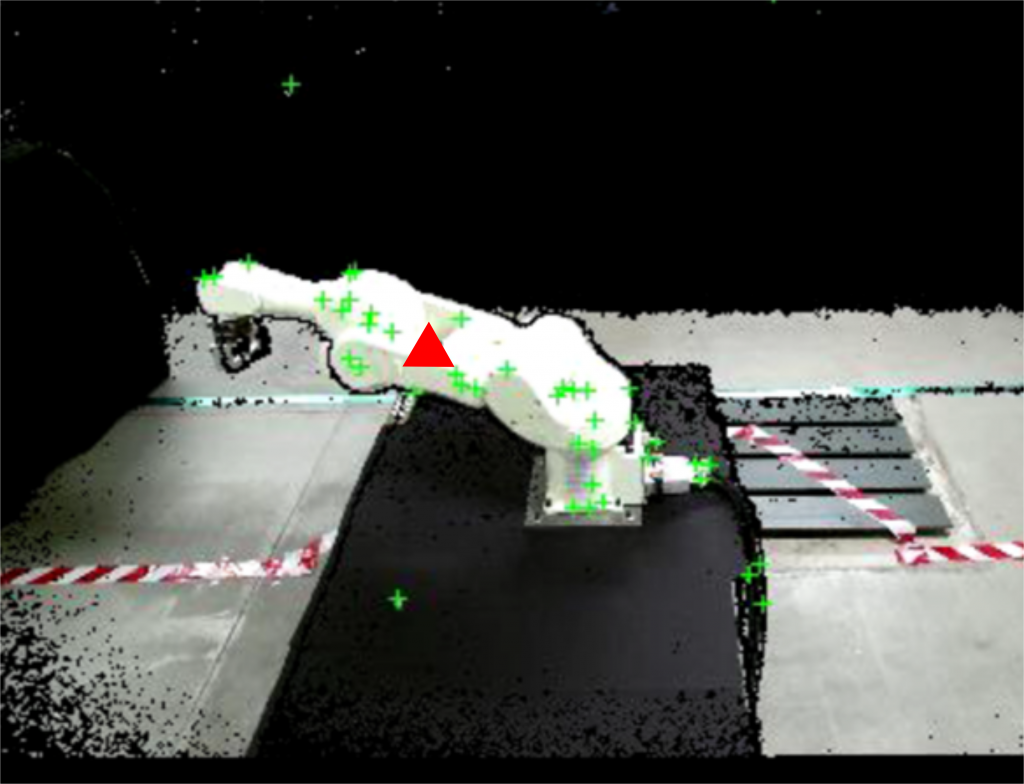
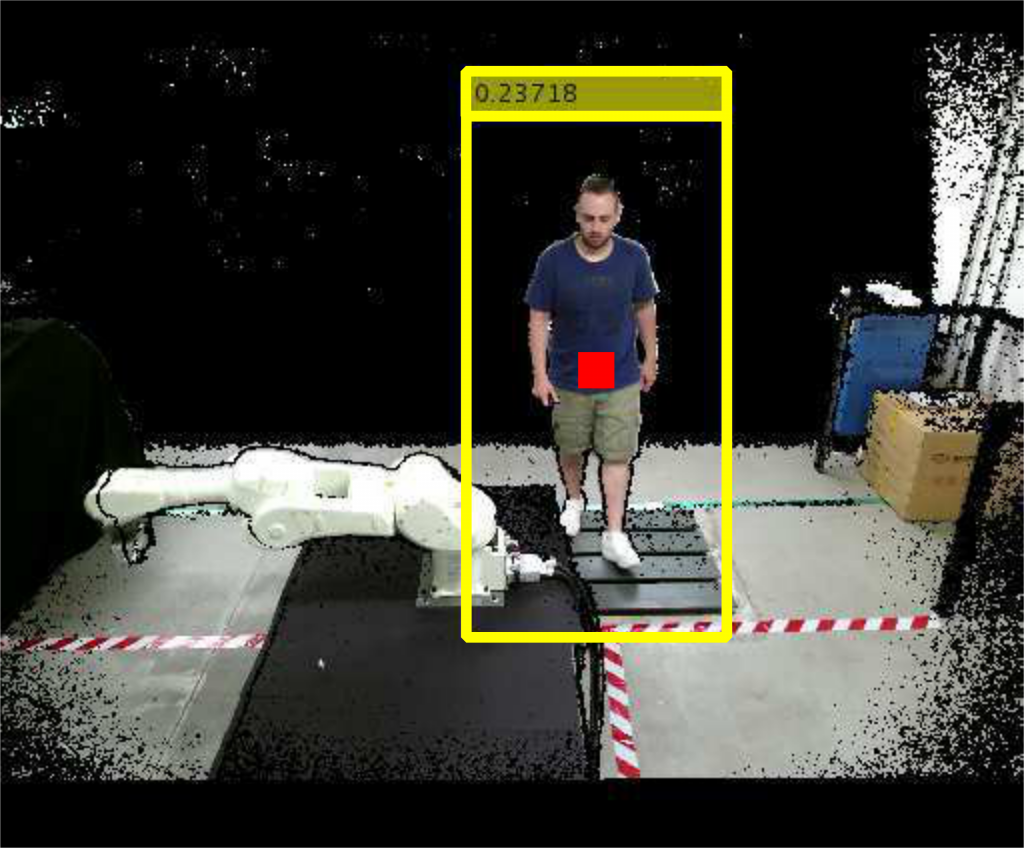
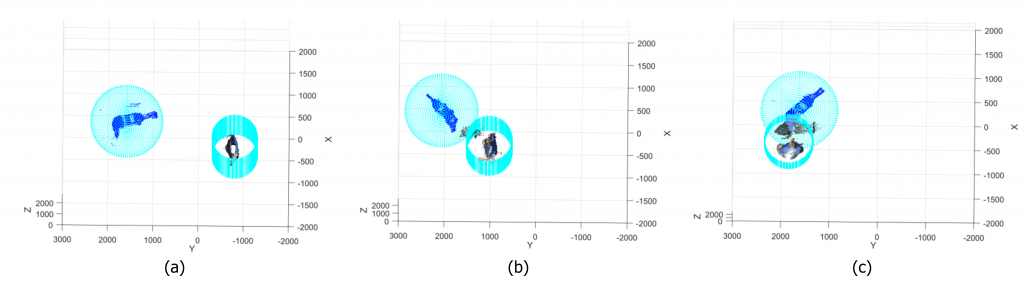
STEP 4: Performance benchmark of the boards

Finally we compared the performances obtained by the two boards when running inference in real-time. The results can be found in the presentation below: if you’re interested, feel free to download it!

The thesis document is also available on request.

Real-Time robot command system based on hand gestures recognition

With the Industry 4.0 paradigm, the industrial world has faced a technological revolution. Manufacturing environments in particular are required to be smart and integrate automatic processes and robots in the production plant. To achieve this smart manufacturing it is necessary to re-think the production process in order to create a true collaboration between human operators and robots. Robotic cells usually have safety cages in order to protect the operators from any harm that a direct contact can produce, thus limiting the interaction between the two. Only collaborative robots can really collaborate in the same workspace as humans without risks, due to their proper design. They pose another problem, though: in order to not harm human safety, they must operate at low velocities and forces, hence their operations are slow and quite comparable to the ones a human operator does. In practice, collaborative robots hardly have a place in a real industrial environment with high production rates.

In this context, this thesis work presents an innovative command system to be used in a collaborative workstation, in order to work alongside robots in a more natural and straightforward way for humans, thus reducing the time to properly command the robot on the fly. Recent techniques of Computer Vision, Image Processing and Deep Learning are used to create the intelligence behind the system, which is in charge of properly recognize the gestures performed by the operator in real-time.

Step 1: Creation of the gesture recognition system

A number of suitable algorithms and models are available in the literature for this purpose. An Object Detector in particular has been chosen for the job, called “Faster Region Proposal Convolutional Neural Network“, or Faster R-CNN, developed in MATLAB.

Object Detectors are especially suited for the task of gesture recognition because they are capable to (i) find the objects in the image and (ii) classify them, thus recognizing which objects they are. Figure 1 shows this concept: the object “number three” is showed in the figure, which the algorithm has to find. 

Fig. 1 - The process undergone by Object Detectors in general. Two networks elaborate the image in different steps: first the region proposals are extracted, which are the positions of object of interest found. Then, the proposals are evaluated by the classification network, which at the end outputs both the position of the object (the bounding box) and the name of the object class.

After a careful selection of gestures, purposely acquired by means of different mobile phones, and a preliminary study to understand if the model was able to differentiate between left and right hand and at the same time between the palm and the back of the hand, the final gestures proposed and their meaning in the control system are showed in Fig. 2.

Fig. 2 - Definitive gesture commands used in the command system.

Step 2: creation of the command system

The proposed command system is structured as in Fig. 3: the images are acquired in real-time by a Kinect v2 camera connected to the master PC and elaborated in MATLAB in order to obtain the gesture commands frame by frame. The commands are then sent to the ROS node in charge of translating the numerical command into an operation for the robot. It is the ROS node, by means of a purposely developed driver for the robot used, that sends the movement positions to the robot controller. Finally, the robot receives the ROS packets of the desired trajectory and executes the movements. Fig. 4 shows how the data are sent to the robot.

Fig. 3 - Overview of the complete system, composed of the acquisition system, the elaboration system and the actuator system.
Fig. 4 - The data are sent to the "PUB_Joint" ROS topic, elaborated by the Robox Driver which uses ROS Industrial and finally sent to the controller to move the robot.

Four modalities have been developed for the interface, by means of a State Machine developed in MATLAB:

  1. Points definition state
  2. Collaborative operation state
  3. Loop operation state
  4. Jog state
Below you can see the initialization of the system, in order to address correctly the light conditions of the working area and the areas where the hands will probably be found, according to barycenter calibration performed by the initialization procedure. 
 
If you are interested in the project, download the presentation by clicking the button below. The thesis document is also available on request.

Related Publications

Nuzzi, C.; Pasinetti, S.; Lancini, M.; Docchio, M.; Sansoni, G. “Deep Learning based Machine Vision: first steps towards a hand gesture recognition set up for Collaborative Robots“, Workshop on Metrology for Industry 4.0 and IoT, pp. 28-33. 2018

Nuzzi, C.; Pasinetti, S.; Lancini, M.; Docchio, M.; Sansoni, G. “Deep learning-based hand gesture recognition for collaborative robots“, IEEE Instrumentation & Measurement Magazine 22 (2), pp. 44-51. 2019

Optical analysis of Trabecular structures

Rapid prototyping, known as 3D printing or Additive Manufacturing, is a process that allows the creation of 3D objects by depositing material layer by layer. The materials used vary: plastic polymers, metals, ceramics or glass, depending on the principle used by the machine for prototyping, such as the deposit of the molten material or the welding of dust particles of the material itself by means of high-power lasersThis technique allows the creation of particular objects of extreme complexity including the so-called “trabecular structures“, structures that have very advantageous mechanical and physical properties (Fig. 1). They are in fact lightweight structures and at the same time very resistant and these characteristics have led them, in recent years, to be increasingly studied and used in application areas such as biomedical and automotive research fields.

Despite the high flexibility of prototyping machines, the complexity of these structures often generates differences between the designed structure and the final result of 3D printing. It is therefore necessary to design and build measuring benches that can detect such differences. The study of these differences is the subject of a Progetto di Ricerca di Interesse Nazionale (PRIN Prot. 2015BNWJZT), which provides a multi-competence and multidisciplinary approach, through the collaboration of various universities: the University of Brescia, the University of Perugia, the Polytechnic University of Marche and the University of Messina

The aim of this thesis was to study the possible measurement set-ups involving both 2D and 3D vision. The solutions identified for the superficial dimensioning of the prototyped object (shown in Fig. 2) are:

  1. a 3D measurement set-up with a light profile sensor;
  2. a 2D measurement set-up with cameras, telecentric optics and collimated backlight.

In addition, a dimensional survey of the internal structure of the object was carried out thanks to to a tomographic scan of the structure made by a selected company.

Fig. 1 - Example of a Trabecular Structure.
Fig. 2 - The prototyped object studied in this thesis.

The 3D measurment set-up

The experimental set-up created involved a light profile sensor WENGLOR MLWL132. The object has been mounted on a micrometric slide to better perform the acquisitions (Fig. 3).
The point cloud is acquired by the sensor using a custom made LabView software. The whole object is scanned and the point cloud is then analyzed by using PolyWorks. Fig. 4 shows an example of acquisition, while Fig. 5 shows the errors between the point cloud obtained and the CAD model of the object.
Fig. 3 - 3D experimental set-up.
Fig. 4 - Example of acquisition using the light profile sensor.
Fig. 5 - Errors between the measured point cloud and the CAD model.

The 2D measurment set-up

The experimental set-up involving telecentric lenses is shown in Fig. 6. Telecentric lenses are fundamental to avoid camera distorsion especially when high resolution for low dimension measurments are required. The camera used is a iDS UI-1460SE, the telecentric lenses are an OPTO-ENGINEERING TC23036 and finally the retro-illuminator is an OPTO-ENGINEERING LTCLHP036-R (red light). In this set-up a spot was also dedicated to the calibration master required for the calibration of the camera.
The acquisitions obtained have some differences according to the use of the the retro-illuminator. Fig. 7, 8 and 9 show some examples of the acquisitions conducted.
Finally, the measured object was then compared to the tomography obtained from a selected company, resulting in the error map in Fig. 10.


Fig. 6 - 2D experimental set-up.
Fig. 10 - Error map obtained comparing the measured object to the tomography.

If you are interested in the project and want to read more about the procedure carried out in this thesis work, as well as the resulting measurments, download the presentation below.

OpenPTrack software metrological evaluation

Smart tracking systems are nowadays a necessity in different fields, especially the industrial one. A very interesting and successful open source software has been developed by the University of Padua, called OpenPTrack. The software, based on ROS (Robotic Operative System), is capable to keep track of humans in the scene, leveraging well known tracking algorithms that use point cloud 3D information, and also objects, leveraging the colour information as well.

Amazed by the capabilites of the software, we decided to study its performances further. This is the aim of this thesis project: to carefully characterize the measurment performances of OpenPTrack both of humans and objects, by using a set of Kinect v2 sensor.

Step 1: Calibration of the sensors

It is of utmost importance to correctly calibrate the sensors when performing a multi-sensor acquisition. 

Two types of calibration are necessary: (i) the intrinsic calibration, to align the colour (or grayscale/IR like in the case of OpenPTrack) information acquired to the depth information (Fig. 1) and (ii) the extrinsic calibration, to align the different views obtained by the different cameras to a common reference system (Fig. 2).

The software provides the suitable tools to perform these steps, and also provides a tool to further refine the extrinsic calibration obtained (Fig. 3). In this case, a human operator has to walk around the scene: its trajectory is then acquired by every sensor and at the end of this registration the procedure aligns the trajectories in a more precise way.

Each of these calibration processes is completely automatic and performed by the software.

Fig. 1 - Examples of intrinsic calibration images. (a) RGB hd image, (b) IR image, (c) syncronized calibration of RGB and IR streams.
Fig. 2 - Scheme of an extrinsic calibration procedure. The second camera K2 must be referred to the first on K1, finally the two must be referred to an absolute reference system called Wd.
Fig. 3 - Examples of the calibration refinement. (a) Trajectories obtained by two Kinect not refined, (b) trajectories correctly aligned after the refinement procedure.

Step 2: Definition of measurment area

Two Kinect v2 were used for the project, mounted on tripods and placed in order to acquire the larger FoV possible (Fig. 4). A total of 31 positions were defined in the area: these are the spots where the targets to be measured have been placed in the two experiments, in order to cover all the FoV available. Note that not every spot lies in a region acquired by both Kinects, and that there are 3 performance regions highlighted in the figure: the overall most performing one (light green) and the single camera most performing ones, where only one camera (the one that is closer) sees the target with a good performance.

Fig. 4 - FoV acquired by the two Kinects. The numbers represent the different acquisition positions (31 in total) where the targets where placed in order to perform a stable acquisition and characterization of the measurment.

Step 3: Evaluation of Human Detection Algorithms

To evaluate the detection algorithms of OpenPTrack it has been used a mannequin placed firmly on the different spots as the measuring target. Its orientation is different for every acquisition (N, S, W, E) in order to better understand if the algorithm is able to correctly detect the barycenter of the mannequin even if it is rotated (Fig. 5).
 

The performances were evaluated using 4 parameters:

  • MOTA (Multiple Object Tracking Accuracy), to measure if the algorithm was able to detect the human in the scene;
  • MOTP (Multiple Object Tracking Precision), to measure the accuracy of the barycenter estimation relative to the human figure;
  • (Ex, Ey, Ez), the mean error between the estimation of the barycenter position and the reference barycenter position known, relative to every spatial dimension (x, y, z);
  • (Sx, Sy, Sz), the errors variability to measure the repetibility of the measurments for every spatial dimension (x, y, z).
Fig. 5 - Different orientations of the mannequin in the same spot.

Step 4: Evaluation of Object Detection algorithms

A different target has been used to evaluate the performances of Object Detection algorithms, shown in Fig. 6: it is a structure on which three spheres have been positioned on top of three rigid arms. The spheres are of different colours (R, G, B), to estimate how much the algorithm is colour-dependant, and different dimensions (200 mm, 160 mm, 100 mm), to estimante how much the algorithm is dimension-dependant. In this case, to estimate the performances of the algorithm the relative position between the spheres has been used as the reference measure (Fig. 7). 
 

The performances were evaluated using the same parameters used for the Human Detection algorithm, but referred to the tracked object instead. 

Fig. 6 - The different targets: in the first three images the spheres are of different colours but same dimension (200 mm, 160 mm and 100 mm), while in the last figure the sphere where all of the same colour (green) but of different dimensions.
Fig. 7 - Example of the reference positions of the spheres used.

If you want to know more about the project and the results obtained, please download the master thesis below.

Vision and safety for collaborative robotics

The communication and collaboration between humans and robots is one of main principles of the fourth industrial revolution (Industry 4.0). In the next years, robots and humans will become co-workers, sharing the same working space and helping each other. A robot intended for collaboration with humans has to be equipped with safety components, which are different from the standard ones (cages, laser scans, etc.).

In this project, a safety system for applications of human-robot collaboration has been developed. The system is able to:

  • recognize and track the robot;
  • recognize and track the human operator;
  • measure the distance between them;
  • discriminate between safe and unsafe situations.

The safety system is based on two Microsoft Kinect v2 Time-Of-Flight (TOF) cameras. Each TOF camera measures the 3D position of each point in the scene evaluating the time-of-flight of a light signal emitted by the camera and reflected by each point. The cameras are placed on the safety cage of a robotic cell (Figure 1) so that the respective field of view covers the entire robotic working space. The 3D point clouds acquired by the TOF cameras are aligned with respect to a common reference system using a suitable calibration procedure [1].

Figure 1 - Positions of the TOF cameras on the robotic cell.

The robot and human detections are developed analyzing the RGB-D images (Figure 2) acquired by the cameras. These images contain both the RGB information and the depth information of each point in the scene.

Figure 2 - RGB-D images captured by the two TOF cameras.

The robot recognition and tracking (Figure 3) is based on a KLT (Kanade-Lucas-Tomasi) algorithm, using the RGB data to detect the moving elements in a sequence of images [2]. The algorithm analyzes the RGB-D images and finds feature points such as edges and corners (see the green crosses in figure 3). The 3D position of the robot (represented by the red triangle in figure 3) is finally computed by averaging the 3D positions of feature points.

Figure 3 - Robot recognition and tracking.

The human recognition and tracking (figure 4) is based on the HOG (Histogram of Oriented Gradient) algorithm [3]. The algorithm computes the 3D human position analyzing the gradient orientations of portions of RGB-D images and using them in a trained support vector machine (SVM). The human operator is framed in a yellow box after being detected, and his 3D center of mass is computed (see the red square in figure 4).

Figure 4 - Human recognition and tracking.

Three different safety strategies have been developed. The first strategy is based on the definition of suitable comfort zones of both the human operator and the robotic device. The second strategy implements virtual barriers separating the robot from the operator. The third strategy is based on the combined use of the comfort zones and of the virtual barriers.

In the first strategy, a sphere and a cylinder are defined around the robot and the human respectively, and the distance between them is computed. Three different situations may occur (figure 5):

  1. Safe situation (figure 5.a): the distance is higher than zero and the sphere and the cylinder are far from each other;
  2. Warning situation (figure 5.b): the distance decreases toward zero and sphere and cylinder are very close;
  3. Unsafe situation (figure 5.c): the distance is negative and sphere and cylinder collide.
Figure 5 - Monitored situations in the comfort zones strategy. Safe situation (a), warning situation (b), and unsafe situation (c).

In the second strategy, two virtual barriers are defined (Figure 6). The former (displayed in green in figure 6) defines the limit between the safe zone (i.e. the zone where the human can move safely and the robot can not hit him) and the warning zone (i.e. the zone where the contact between human and robot can happen). The second barrier (displayed in red in figure 6) defines the limit between the warning zone and the error zone (i.e. the zone where the robot works and can easily hit the operator).

Figure 6 - Virtual barriers defined in the second strategy.

The third strategy is a combination of comfort zones and virtual barriers (figure 7). This strategy gives redundant information: both the human-robot distance and positions are considered.

Figure 7 - Redundant safety strategy: combination of comfort zones and virtual barriers.

Conclusions

 The safety system shows good performances:
  • The robotic device is always recognized;
  • The human operator is recognized when he moves frontally with respect to the TOF cameras. The human recognition must be improved (for example increasing the number of TOF cameras) in case the human operator moves transversally with respect to the TOF cameras;
  • The safety situations are always identified correctly. The algorithm classifies the safety situations with an average delay of 0.86 ± 0.63s (k=1). This can be improved using a real time hardware.

Related Publications

Pasinetti, S.; Nuzzi, C.; Lancini, M.; Sansoni, G.; Docchio, F.; Fornaser, A. “Development and characterization of a Safety System for Robotic Cells based on Multiple Time of Flight (TOF) cameras and Point Cloud Analysis“, Workshop on Metrology for Industry 4.0 and IoT, pp. 1-6. 2018