3D vision for the measurement of eccentricity of pipes

The aim of this project has been to design, to implement and to characterize a system for the 3D measurement of eccentricity of pipes.

This system was originally based on four laser slits, suitable oriented with respect to the pipe to acquire the external and the internal semi-profiles. In order to develop a compact version of the instrument, we studied a new optical layout, which halves the number of the cameras.

Related Publications

Sansoni, G.; Bellandi, P.; Docchio, F. “Design and development of a 3D system for the measurement of tube eccentricity“, Measurement Science and Technology, Vol. 22, no. 7. 2011

Sansoni, G.; Bellandi, P.; Docchio, F. “3D system for the measurement of tube eccentricity: an improved, rugged, easy to calibrate layout“, Measurement Science and Technology, Vol. 24, no. 3. 2013

The Robo3DScan Project

Recently, the integration of vision with robots has gained considerable attention from industry. Pick and place, sorting, assembling, cutting and welding processes are examples of applications which can have great advantage from the combination of information from 3D images with robot motion.

Our laboratory developed, in collaboration with DENSO EUROPE B. V., a system integrating 3D vision into robotic cells. The project led to the Roboscan system.

Roboscan is a Robot cell that combines 2D and 3D vision in a simple device, to aid a Robot manipulator in pick-and-place operations in a fast and accurate way. The optical head of Roboscan combines the two vision systems: the camera is used “stand-alone” in the 2D system, and combined to a laser slit projector in the 3D system, which operates in the triangulation mode. The 2D system, using suitable libraries, provides the preliminary 2D information to the 3D system to perform in a very fast, flexible and robust way the point cloud segmentation and fitting. The most innovative part of the system is represented by the use of robust 2D geometric template matching as a means to classify 3D objects. In this way, we avoid time-consuming 3D point cloud segmentation and 3D object classification, using 3D data only for estimating pose and orientation of the robot gripper. In addition, a novel approach to the template definition in the 2D geometric template matching is proposed, where the influence of surface reflectance and colour of the objects over the definition of the template geometry is minimized.

Related Publications

Bellandi, P.; Docchio, F.; Sansoni, G. “Roboscan: a combined 2D and 3D vision system for improved speed and flexibility in pick-and-place operation“, The International Journal of Advanced Manufacturing Technology, Vol. 69, no. 5–8, pp. 1873–1886. 2013

3D Acquisition and modeling for crime scene documentation

This project is aimed at testing the performance of 3D optical acquisition and reverse engineering to carry out the contact-less gauging of crime scenes for their documentation and analysis. In particular, the study focuses on two aspects. The former is the “in-field” measurement and modeling of crime scenes.

The activity carried out by the Laboratory staff deals with a number of significant cases. A comprehensive summary of the experiences is in the references below.

Related Publications

Cavagnini, G.; Scalvenzi, M.; Trebeschi, M.; Sansoni, G. “Reverse engineering from 3D optical acquisition: application to Crime Scene Investigation“, Proceedings of Virtual Modelling and Rapid Manufacturing, Advanced Research in Virtual and Rapid Prototyping, pp. 195-201. 2007

Sansoni, G.; Docchio, F.; Trebeschi, M.; Scalvenzi, M.; Cavagnini, G.; Cattaneo, C. “Application of three-dimensional optical acquisition to the documentation and the analysis of crime scenes and legal medicine inspection“, 2007 2nd International Workshop on Advances in Sensors and Interface, pp. 1-10. 2007

Sansoni, G.; Cattaneo, C.; Trebeschi, M.; Gibelli, D.; Porta, D.; Picozzi, M. “Feasibility of contactless 3D optical measurement for the analysis of bone and soft tissue lesions: new technologies and perspectives in forensic sciences“, Journal of Forensic Sciences, Vol. 54, no. 3, pp. 540-545. 2009

Sansoni, G.; Cattaneo, C.; Trebeschi, M.; Gibelli, D.; Poppa, P.; Porta, D.; Maldarella, M.; Picozzi, M. “Scene-of-Crime Analysis by a 3-Dimensional Optical Digitizer: A Useful Perspective for Forensic Science“, The American Journal of Forensic Medicine and Pathology, Vol. 32 no. 3, pp. 280-286. 2011

The Winged Victory of Brescia

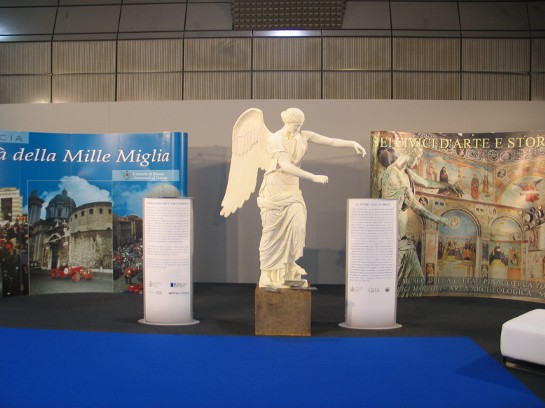
The natural commitment of the Laboratory to applied research and to cooperation with institutions led to the establishment of an agreement between the Comune of Brescia and the University of Brescia for the study and the 3D digitization of one of the symbols of the City, the statue named ‘Vittoria Alata’. This 2m-high, bronze statue is located at the Museo of Santa Giulia at Brescia.
The original motivation of the archaeologists was to measure with high accuracy the distances between pairs of fiduciary points, in order to determine the archetype of the statue, and to solve the problem of its collocation in the right temporal and spatial framework. 

To obtain the statue proportions, the statue was completely acquired using OPL-3D; Multiview registration, meshing and modeling of the mesh resulted in the virtual copy of the statue. By means of rapid prototyping, different copyes varying in the reproduction scale have been developed.

The copy of the Winged Victory developed by the Laboratory staff represented the city of Brescia at the exhibition of the ANCI Conference, Brescia, 8-9 november 2007.

ANCI 002.jpg

Relevant Publications

Sansoni, G.; Patrioli, A.; Docchio, F.; Morandini, F. “Rilievo tridimensionale della Vittoria mediante tecniche di misura non a contatto“, Nuove ricerche sul Capitolium di Brescia: scavi, studi e restauri, pp. 159-163. 2002

Sansoni, G.; Docchio, F.; Patrioli, A. “Il rilievo 3D di forme complesse: stato dell’arte, applicazioni e prospettive“, Atti del 7° Convegno Nazionale di Strumentazione e metodi di misura elettroottici, pp. 263-270. 2002 

Sansoni, G.; Docchio, F. “A special case of 3-D optical measurements and reverse engineering for automotive applications: the Ferrari 250 Mille Miglia“, Proceedings of the 21st IEEE Instrumentation and Measurement Technology Conference, Vol. 2, pp. 1354-1359. 2004

Sansoni, G.; Docchio, F. “3-D optical measurements in the field of cultural heritage: the case of the Vittoria Alata of Brescia“, IEEE Transactions on Instrumentation and Measurement, Vol. 54, no. 1, pp. 359-368. 2005

3D prosthetic applications to maxillo-facial defects

In the last years, prosthetic techniques have gained increased interest in post oncological reconstruction and in congenital defect treatment. Both the fuctional and the aesthetic characteristics of the prosthesis are crucial, in view of allowing the patient to overcome the social, psychological and economic problems deriving from their handicap.

Traditional reconstruction techniques present a number of lacks: the patient’s discomfort and stress, the inaccuracy of the replicas, and the dependence on the artistic skills of an experienced prosthetist. In addition, the mould production process is cumbersome, and time consuming. Finally, the overall process is not adaptive, i.e., whenever the existing prothesis should be replaced, the overall process must be carried out from scratch.

The purpose of this research activity is to develop a novel approach that combines optical three-dimensional acquisition, reverse engineering (RE) and rapid prototyping (RP) for the prosthetic reconstruction of facial prostheses.

Relevant Publications

Sansoni, G.; Cavagnini, G.; Docchio, F.; Gastaldi, G. “Virtual and physical prototyping by means of a 3D optical digitizer: application to facial prosthetic reconstruction“, Virtual and Physical Prototyping, Vol. 4, pp. 217-226. 2009

Sansoni, G.; Trebeschi, M.; Cavagnini, G.; Gastaldi, G. “3D Imaging acquisition, modeling and prototyping for facial defects reconstruction“, Proceedings of SPIE Three-Dimensional Imaging Metrology, Vol. 7239, pp. 1-8. 2009

Cavagnini, G.; Sansoni, G.; Vertuan, A.; Docchio, F. “3D optical Scanning: application to forensic medicine and to maxillofacial reconstruction“, Proceedings of International Conference on 3D Body Scanning Technologies, pp. 167-178. 2010

The OCT-MAT Project: early diagnosis of ocular edemas

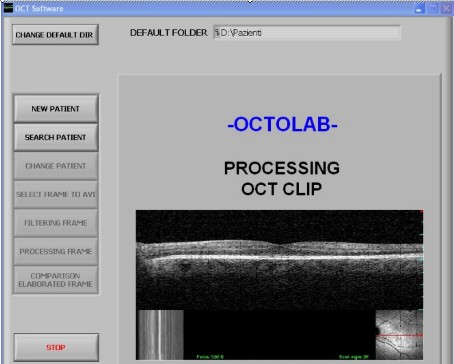
The aim of this project was to develop a practical, user friendly software tool in order to have significant and quantitative information on macular edema from OCT images. The activity has been carried out in collaboration with the Cattedra di oculistica dell’ospedale di Varese (Italy), in 2006-2008. We have developed a novel, dedicated software, called OCT-Measurements Analysis Tool (OCT-MAT), that acquires the avi files from an OCT 3 (Carl Zeiss, Meditec, Dublin, CA, USA) and a OCT/SLO (Ophthalmic Technologies Inc., Toronto, Canada) instruments, and carries out five subsequent elaboration steps. These are (i) the creation of patient’s folder, (ii) the selection of frames from the avi files, (iii) the filtering of the frames, (iv) the extraction of quantative information from the hyporeflective areas and their analysis, and (v) the comparison among frames for patient follow-up.

The OCT-MAT software is able to process and output quantitative information in terms of the number of empty spaces and of their extension in micron2. In addition, it allows us to analyze edema reabsorption during time, by suitable clustering of macular empty spaces (i.e., hyporeflective areas). This new OCT-MAT software has been applied on 30 healthy eyes and on three groups of patients with different macular diseases.The use of the OCT-MAT software allows us to measure the edema in terms of both the number of empty spaces and of their extension directly from the inside retina. Suitable tools are available to customize the standard modalities of operation, in order to optimize the measurements. A dedicated staging system gives a quick interpretation of the results.

The possibility of comparing macula edema measurements belonging to different images processed in subsequent times results in the achievement of numerical information, instead of simple qualitative evaluation, on the evolution of macular edema as well as on edema clearance. The OCT-MAT can be installed on standard, non-dedicated hardware, and the learning curve of an experienced retina specialist is very short.

oct_front_panel.jpg

Relevant Publications

Sansoni, G.; Tironi, M.; Trebeschi, M.; Tottoli, F.; Azzolini, C.; Donati, S. “Diagnostica oculare mediante sistema di analisi per la misura di aree iporiflettenti intraretiniche“, Atti del XXIV Congresso Nazionale Associazione “Gruppo di Misure Elettriche ed Elettroniche”, pp. 319-320. 2007

Prati, M.; Donati, S.; Tartaglia, V.; Sansoni, G.; Tironi, M.; Chelazzi, P.; Brancato, R.; Azzolini, C. “Correlation Between Visual Acuity and Retinal Sensitivity Before and After Surgery for Macular Diseases“, Investigative Ophthalmology and Visual Sciences, Vol. 49, no. 13. 2008

Donati, S.; Sansoni, G.; Tironi, M.; Chelazzi, P.; Brancato, R.; Azzolini, C. “Evaluation of results of macular surgery: Role of microperimetry-related OCT imaging study“, Abstract and Presentation, 8th. EURETINA congress, Vienna. 2008

The Brotlaibidole project

The project is aimed at studying a very specific typology of archaeological finds, called the ‘Tavolette enigmatiche‘ or ‘Brotlaibidole‘. The activity developed at the Laboratory focused on (i) the optical 3D acquisition of the pieces, (ii) the creation of 3D meshes, and (iii) the study of the occurrences and of the morphological signs impressed on them.

This work is part of a larger activity that involves a number of partners. These are the Regione Lombardia (A.M. Ravagnan), the Provincia di Mantova (T. Grizzi), the Comune di Cavriana (B. Righetti), the Museo Archeologico dell’Alto Mantovano (A. Piccoli), the Università di Verona (S. Marchesini).

The “Brotlaibidole” are small baked-clay objects of prevalently ovoid shape of the 2100-1400 B.C. periods, engraved with symbols and drilled holes whose meaning is still unknown.

Their presence in Italy and in many countries in the northeast Europe represents an “enigma” for the specialists. The reason is that the shape and the orientation of the signs is very similar among the objects, even if they have been found in different geographical sites.

Hence, we have been required to accomplish an extensive measurement campaign in Europe, and to produce and collect the 3D models in a unique database, in view of their future study by the specialists. To carry out the measurement, we used the Vivid 910 sensor (Konica Minolta Inc.). Besides the measurement performances, that well suit to the resolutions required in this application, the system is rugged, portable, and fast in the setup and the acquisition processes. So far, 30 specimens have been acquired, modeled and organized in a database. Their resolution is 120μm.

Following the acquisition and point-cloud elaboration, we carried out a selection of symbols to be compared. The different symbols were extracted from the models and properly oriented in a suitable reference frame.

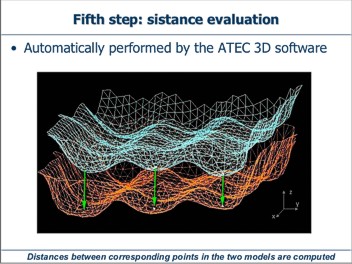
Symbols from different “pieces” were then superimposed and aligned, in a totally automatic way.

Color coding was used as a user-friendly way to obtain information about the amount of overlapping between the two symbols. All these steps were performed by the self developed “ATEC-3D” software: a user-friendly environment, specifically intended to be used by a non software expert such as an archaeologist.

In the ATEC-3D panel, the signs to be compared are chosen, and they appear as 3D models. Point clouds and their superposition in color coding are presented after suitable automatic registration and distance compensation. An index of similarity (rms value of the differences) is obtained to quantitatively assess the goodness of overlapping.

This process has been tested on a suitable number of self-made signs used as references, printed onto clay surfaces under different angles and with different pressures.

The ATEC-3D software has been delivered to the archaeologists, who have now started the overall comparison of all signs derived from the 30 models, whose 3D acquisition has been made and whose signs are now in the common database.