Cosmic ray detection based measurement systems

Cosmic radiation has been known since the first decades of the 20th century: before the era of accelerators, cosmic rays have been considered, for decades, the best source of projectiles to investigate the core of matter, from nuclei to elementary particles.

Due to their property of crossing very thick and non-transparent materials, cosmic rays appear as suitable tools for the realization of measurement systems, especially as helpful alternative to traditional optical systems, when detectors are not mutually visible.

An example of application of cosmic rays to monuments monitoring is presented in this post: it has been developed in collaboration with the Istituto Nazionale di Fisica Nucleare (INFN) and the Department of Industrial and Mechanical Engineering of the University of Brescia.

Related Publications

Bodini, I.; Bonomi, G.; Cambiaghi, D.; Magalini, A. “Cosmic ray detection based measurement systems: a preliminary study”, Measurement Science and Technology, Vol. 18, pp. 3537-3546. 2007

Zenoni, A.; Bonomi, G.; Donzella, A.; Subieta, M.; Baronio, G.; Bodini, I.; Cambiaghi, D.; Lancini, M.; Vetturi, D.; Barnabà, O.; Fallavollita, F.; Nardò, R.; Riccardi, C.; Rossella, M.; Vitulo, P.; Zumerle, G. “Historical building stability monitoring by means of a cosmic ray tracking system”, Proceedings of 4th International Conference on Advancements in Nuclear Instrumentation Measurement Methods and their Applications (ANIMMA 2015). 2015

LASER ALLUMINIO: Real-time acquisition for laser welding monitoring

The objective of this project was to develop a vision system for the real-time acquisition and saving of images produced in laser welding processes. This activity represents an initial step in the context of a research project aimed at studying the relation among the welding parameters and the quality of the welds, as they are captured by the vision system, for the feedback of the welding parameters during the welding.

The Laboratory worked in collaboration with TubeTech Machinery srl (Cazzago San Martino, Brescia, Italy), that was the company interested into this study.
The hardware used to devop this application is the Embedded Vision System (National Instruments) with LabVIEW 8.6.1, the IMAQ Vision libraries and the Real Time module for LabView. The vision system is based on the cooperation between a Host PC (PCS), and the NI EVS 1464 device. The acquisition campaigns have been done on one of the welding machines  available at TubeTech Machinery.

Suitable image elaboration tools have been developed to extract information from the videos captured by the system.

SMART BREAK – Bialetti REstoration Adaptive Kit

SMART BREAK is a project funded by Regione Lombardia thanks to a grant in the field of “Smart cities and communities”, for ambient assisted living. Nine companies (Bialetti Industrie Spa, Connexxalife Srl, Elemaster Spa, Lampia Srl, Gualtiero Marchesi Srl, Synergie CAD Instruments Srl, SAEF Srl, Sait Srl, and Signal Srl), two universities (UniBS and UniBG) and one hospital (San Raffaele) have joined the SMART BREAK project, and Bialetti Industrie is the leading partner.

SMART BREAK will be a modular system: food will be heated, hot and cold drinks will be provided as well as smoothies and users will be profiled, to create a food diary.

The Laboratory contributes to the project and works on a vision system, based on a smart camera (VisionCam XS – Imago Technologies), which communicates by means of an HMI, via a Modbus Ethernet Protocol. The developed vision system is capable of reading EAN barcodes, for the food diary and of recognizing lunch boxes of known weight.

The machine under development. Ileana is working at the vision system.
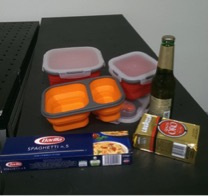
Food containers and barcodes that have to be recognized.
present_photogrammetry.jpg
Examples of bar code detection.

Biomechanical models of human posture based on the dynamics of a disturbance

The objective of this research activity is to analyze and model the behavior of healthy subjects during equilibrium perturbations to understand how the posture strategies of a human subject changes from a static environment to a dynamic situation.

The balance function is a complex mechanism that involves, in particular, the nervous system. The diseases of the nervous system affect the structures involved in equilibrium with a consequent reduction in the capacity of gait and balance. Clinicians have different tools to characterize the instability. The most used is the static posturography, which assesses the balance from the registration of the position of the centre of pressure of the subject who is standing on a force platform.

The sensitivity of static posturography can be improved placing the subject in conditions of unstable equilibrium or stability limit and, thus, increasing the oscillation of the centre of pressure. This technique is defined as dynamic posturography, which measure the capability of the subject to maintain the balance during different test, performed on a motorized platform. Using vision systems and force platforms both the kinematic and the dynamic behaviour of the subject can be studied.

Related Publications

Pasinetti, S.; Lancini, M.; Pasqui, V. “Development of an optomechanical measurement system for dynamic stability analysis“, 2015 6th International Workshop on Advances in Sensors and Interfaces (IWASI), pp. 199-203. 2015

Surface EMG measurements for muscle activations analysis

The aim of this research activity is to study and develop new automatic methods for the analysis of the SEMG signal to reduce the measurement variability and subjectivity and increase the quality of the medical diagnosis.

Surface electromyography (SEMG) is a widely used technique for the evaluation of posture and movement. The analysis of the SEMG signal can assess neuromuscular pathologies in medical disciplines such as neurology, neurophysiology, orthopedics and rehabilitation. Most common uses of SEMG signals are amplitude (or SEMG pattern) measurement or timing measurement.

SEMG analysis frequently requires the estimation of muscle activation timing, as in the case of the functional characterization of the human movement, or of the study of muscle synergies. Muscle timing detection could also be useful in amputated subjects, where the SEMG signal may be used for the control of prosthesis.

The most common method to analyze SEMG signal is still visual inspection, which strongly depends on the skills and the experience of the examiner and suffers from a high subjectivity.

Related Publications

Pasinetti, S.; Lancini, M.; Bodini, I.; Docchio, F. “A Novel Algorithm for EMG Signal Processing and Muscle Timing Measurement“, IEEE Transactions on Instrumentation and Measurement, Vol. 64, no. 11, pp. 2995-3004. 2015

Student Projects 2014-2015

The article presents a list of projects developed for the course of 2D Vision Systems during the year 2014-2015.

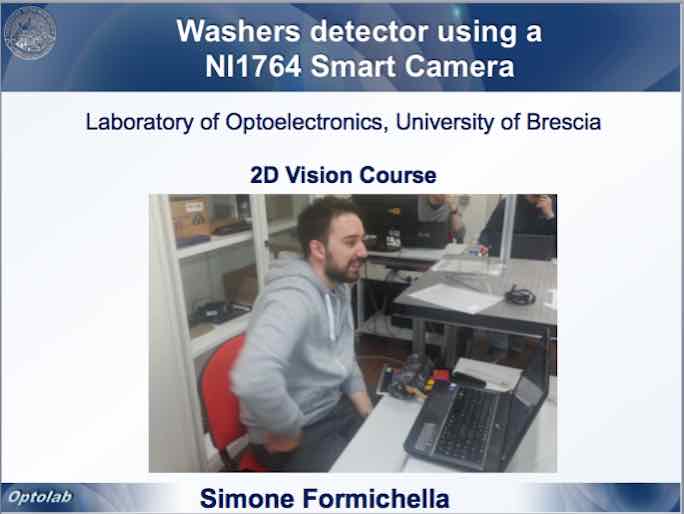
The first project was developed by Simone Formichella, with the aim of developing a small vision system to detect objects on a rotating table using a NI1764 smart camera.

One of the problems the student faced was how to detect reflective objects with optical sensors and how to deal with the transparency of the rotating plate. Moreover, the smart camera was able to perform only lightweight elaborations, so the system had to be splitted between camera and the host PC, which was able to perform the more computational heavy processing required. The whole system was developed using LabView.

The second project was developed by Alessandro Nastro, with the aim of using a very low cost projector to project fringes for 3D reconstruction. 

The student created a triangulation system with two Basler Scout scA1390 cameras and a low cost projector (Philips PicoPix PPX22505). The student dealt with the camera 2D calibration performed by a custom made VI developed in LabView in order to correctly detect the fringes projected on the image and retrieve the period between them. In this way it is possibile to perform a 3D reconstruction of an object!

The third project was developed by Pietro Craighero with the aim of measuring the inner and the outer radius of a mechanical object using telecentric lenses.

Telecentric lenses allow users to obtain images with high contrast with almost no image distorsion, thus being a fundamental piece of any high accuracy vision system. The student created a small set-up with a red-light laser and a telecentric camera, used to acquire 2D images of the object to be measured. The software used for the project was developed in LabView.

Defect detection of mandrels using 3D Laser scanning

This project was committed to the Laboratory by Tenaris Dalmine, and was aimed at developing algorithms and measurement procedures for detecting defects in mandrels, for on-line inspection and quality control purposes.

The mandrels are scanned by using a laser slit: the profiles are acquired and the 3D map of the surface is obtained. Careful analysis of the 3D map allows the detection of surface defects.

The work is subjected to non disclosure agreements: the only available information is in the presentation below.

Optoranger: a 3D pattern matching method for bin picking applications

Optoranger is a new method, based on 3D vision, for the recognition of free-form objects in the presence of clutters and occlusions, ideal for robotic bin picking tasks. The method can be considered as a compromise between complexity and effectiveness.

A 3D point cloud representing the scene is generated by a triangulation-based scanning system, where a fast camera acquires a blade projected by a laser source. Image segmentation is based on 2D images, and on the estimation of the distances between point pairs, to search for empty areas. Object recognition is performed using commercial software libraries integrated with custom-developed segmentation algorithms, and a database of model clouds created by means of the same scanning system.

Experiments carried out to verify the performance of the method have been designed by randomly placing objects of different types in the Robot work area. The results demonstrate the excellent ability of the system to perform the bin picking procedure, and the reliability of the method proposed for automatic recognition of identity, position and orientation of the objects.

Related Publications

Sansoni, G.; Bellandi, P.; Leoni, F.; Docchio, F. “Optoranger: A 3D pattern matching method for bin picking applications“, Optics and Lasers in Engineering, Vol. 54, pp. 222-231. 2014

Combined use of Optical and Contact probes

This activity was carried out in the frame of a collaboration between our Laboratory and the DIMEG Metrological Laboratory of the University of Padova. It was aimed at integrating the measurement information from a 3D Vision sensor and a Coordinate Measuring Machine (CMM) for the reverse engineering of free-form surfaces. The objective was to reconstruct the CAD model of comples shapes with high accuracy and at the same time rapidly, and minimising the operator time.

Automotive applications: Reverse engineering of a Ferrari MM

This project was performed to demonstrate the feasibility of using an optical 3d range sensor based on fringe projection (OPL-3D) to acquire the shell of the Ferrari Mille Miglia shown in the figure. The point cloud were merged and the whole mash was obtained. A scaled copy of the shell was prototyped.

Related Publications