Combined use of Optical and Contact probes

This activity was carried out in the frame of a collaboration between our Laboratory and the DIMEG Metrological Laboratory of the University of Padova. It was aimed at integrating the measurement information from a 3D Vision sensor and a Coordinate Measuring Machine (CMM) for the reverse engineering of free-form surfaces. The objective was to reconstruct the CAD model of comples shapes with high accuracy and at the same time rapidly, and minimising the operator time.

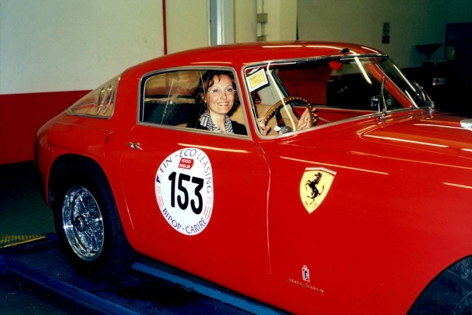
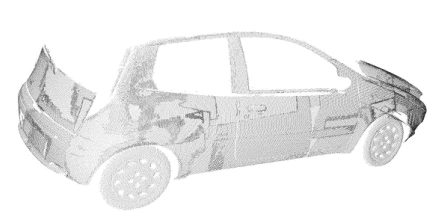
Automotive applications: Reverse engineering of a Ferrari MM

This project was performed to demonstrate the feasibility of using an optical 3d range sensor based on fringe projection (OPL-3D) to acquire the shell of the Ferrari Mille Miglia shown in the figure. The point cloud were merged and the whole mash was obtained. A scaled copy of the shell was prototyped.

Related Publications

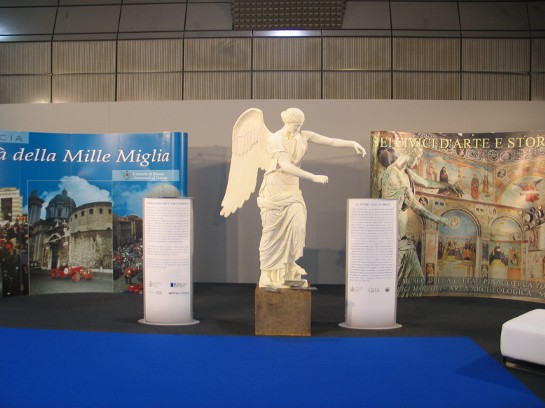
The Winged Victory of Brescia

The natural commitment of the Laboratory to applied research and to cooperation with institutions led to the establishment of an agreement between the Comune of Brescia and the University of Brescia for the study and the 3D digitization of one of the symbols of the City, the statue named ‘Vittoria Alata’. This 2m-high, bronze statue is located at the Museo of Santa Giulia at Brescia.
The original motivation of the archaeologists was to measure with high accuracy the distances between pairs of fiduciary points, in order to determine the archetype of the statue, and to solve the problem of its collocation in the right temporal and spatial framework. 

To obtain the statue proportions, the statue was completely acquired using OPL-3D; Multiview registration, meshing and modeling of the mesh resulted in the virtual copy of the statue. By means of rapid prototyping, different copyes varying in the reproduction scale have been developed.

The copy of the Winged Victory developed by the Laboratory staff represented the city of Brescia at the exhibition of the ANCI Conference, Brescia, 8-9 november 2007.

ANCI 002.jpg

Relevant Publications

Sansoni, G.; Patrioli, A.; Docchio, F.; Morandini, F. “Rilievo tridimensionale della Vittoria mediante tecniche di misura non a contatto“, Nuove ricerche sul Capitolium di Brescia: scavi, studi e restauri, pp. 159-163. 2002

Sansoni, G.; Docchio, F.; Patrioli, A. “Il rilievo 3D di forme complesse: stato dell’arte, applicazioni e prospettive“, Atti del 7° Convegno Nazionale di Strumentazione e metodi di misura elettroottici, pp. 263-270. 2002 

Sansoni, G.; Docchio, F. “A special case of 3-D optical measurements and reverse engineering for automotive applications: the Ferrari 250 Mille Miglia“, Proceedings of the 21st IEEE Instrumentation and Measurement Technology Conference, Vol. 2, pp. 1354-1359. 2004

Sansoni, G.; Docchio, F. “3-D optical measurements in the field of cultural heritage: the case of the Vittoria Alata of Brescia“, IEEE Transactions on Instrumentation and Measurement, Vol. 54, no. 1, pp. 359-368. 2005

OPL-3D_1.jpg

OPL-3D: a portable system for point cloud acquisition

OPL-3D has been specifically designed for applications of reverse engineering and rapid prototyping, as well as for applications of measurement and quality control.

The system exploits active stereo vision (the absolute approach is implemented) using time-multiplexing based on the Gray-Code-Phase-Shifting method.

The projector-camera pair

OPL-3D can host a wide variety of projectors. In the left figure in Fig. 1 the device is the ABW LCD 320: it is a microprocessor-controlled and column-driven projector, specifically intended to be used in this class of systems. Alternatively, those devices currently available for video projection can be succesfully used, as that one shown on the right figure in Fig. 1 (Kodak DP 900, based on DLP technology).

The detector is a commercial CCD video camera. In the configurations shown in Fig. 1, the camera is an inexpensive colour Hitachi KP D50, with standard resolution (752 x 582 px). However, any type of camera (black/white or colour, with single or multiple CCDs for colour separation, and with different pixel densities) can be mounted on the system, depending on the application and on the projector used. In Fig. 2, for example, a 1300 x 1030 px digital video camera (Basler model) is mounted, to acquire at the required resolution large fields of views

The mount

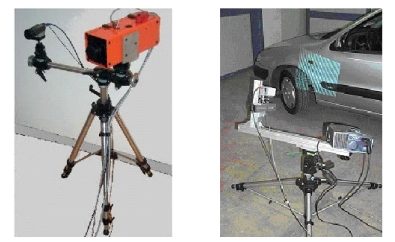
The projector and the camera are mounted onto a rigid bar, that can be easily moved around the scene by means of a tripod, and that holds the adjustment units for proper orientation. The mount is fully reconfigurable: all parameters can be varied according to the distance from the target, the required measurement resolution and the FoV (Fig. 3).

Given the fact that through sophisticated calibration procedures the system is able to finely estimate the operating parameters, no accurate positioning equipment (micropositioners, microrotators) is required, the only requirement being stability of the mount during the measurement procedure.

Fig. 4 shows two examples of on-site measurements of complex shapes where the full flexibility of the system was mandatory to perform the acquisition.

Fig. 3 - Images of the tripods used and of the equipment of the prototype.
Fig. 4 - Two on-site acquisition campaigns carried out by the Laboratory: the Winged Victory point cloud acquisition (left) and the Ferrari point cloud acquisition (right).

The electronic hardware

OPL-3D is equipped with a PC, that has the purpose of (i) driving the projector with the appropriate pattern sequence, (ii) acquiring the image sequences from the target, and (iii) elaborating the images. In addition, it contains all the features to perform sophisticated procedures for setting up and reconfiguration.

The PC is in the current configuration a Pentium III 900 MHz, 1 GB Ram, equipped with a Matrox Meteor II Frame Grabber. The Projector is operated by the PC through the Serial Connector.

PERFORMANCE

OPL-3D exhibits low-measurement uncertainty (120 mm) over large measurement areas (450 x 340 mm), linearly scalable in the case of smaller areas. Special care has been devoted to flexibility of use, in-field measurement setting, reconfigurability and robustness against environmental light changes and surface colour and texture

Fig. 5 shows the acquisition of the blue car already seen in Fig. 2. Multiview alignment and registration is performed by either purposely designed software or by means of commercially available products, depending on the complexity of the process.

Fig. 5 - Point Cloud obtained with every acquisition aligned to form a complete and dense reconstruction.

Technology transfer

OPL 3-D has been put into the market by Open Technologies s.r.l., Italy, a start-up company of the University of Brescia, under the Trade Name of 3DShape, in a manifold of versions, including sophisticated software for multi-view combination, point cloud manipulation and transformation, up to surface generation.