Best Paper Award at IEEE I2MTC 2019

Congratulations to our team for winning the Best Paper Award for the paper “Qualification of Additive Manufactured Trabecular Structures Using a Multi-Insutrumental Approach” presented at the 2019 IEEE International Instrumentation and Measurment Technology Conference!

This research is part of a Progetto di Ricerca di Interesse Nazionale (PRIN) carried out in collaboration with the University of Brescia, the University of Perugia, the Polytechnic University of Marche and the University of Messina.

To read more about the project, check out this page!

Optical analysis of Trabecular structures

Rapid prototyping, known as 3D printing or Additive Manufacturing, is a process that allows the creation of 3D objects by depositing material layer by layer. The materials used vary: plastic polymers, metals, ceramics or glass, depending on the principle used by the machine for prototyping, such as the deposit of the molten material or the welding of dust particles of the material itself by means of high-power lasersThis technique allows the creation of particular objects of extreme complexity including the so-called “trabecular structures“, structures that have very advantageous mechanical and physical properties (Fig. 1). They are in fact lightweight structures and at the same time very resistant and these characteristics have led them, in recent years, to be increasingly studied and used in application areas such as biomedical and automotive research fields.

Despite the high flexibility of prototyping machines, the complexity of these structures often generates differences between the designed structure and the final result of 3D printing. It is therefore necessary to design and build measuring benches that can detect such differences. The study of these differences is the subject of a Progetto di Ricerca di Interesse Nazionale (PRIN Prot. 2015BNWJZT), which provides a multi-competence and multidisciplinary approach, through the collaboration of various universities: the University of Brescia, the University of Perugia, the Polytechnic University of Marche and the University of Messina

The aim of this thesis was to study the possible measurement set-ups involving both 2D and 3D vision. The solutions identified for the superficial dimensioning of the prototyped object (shown in Fig. 2) are:

  1. a 3D measurement set-up with a light profile sensor;
  2. a 2D measurement set-up with cameras, telecentric optics and collimated backlight.

In addition, a dimensional survey of the internal structure of the object was carried out thanks to to a tomographic scan of the structure made by a selected company.

Fig. 1 - Example of a Trabecular Structure.
Fig. 2 - The prototyped object studied in this thesis.

The 3D measurment set-up

The experimental set-up created involved a light profile sensor WENGLOR MLWL132. The object has been mounted on a micrometric slide to better perform the acquisitions (Fig. 3).
The point cloud is acquired by the sensor using a custom made LabView software. The whole object is scanned and the point cloud is then analyzed by using PolyWorks. Fig. 4 shows an example of acquisition, while Fig. 5 shows the errors between the point cloud obtained and the CAD model of the object.
Fig. 3 - 3D experimental set-up.
Fig. 4 - Example of acquisition using the light profile sensor.
Fig. 5 - Errors between the measured point cloud and the CAD model.

The 2D measurment set-up

The experimental set-up involving telecentric lenses is shown in Fig. 6. Telecentric lenses are fundamental to avoid camera distorsion especially when high resolution for low dimension measurments are required. The camera used is a iDS UI-1460SE, the telecentric lenses are an OPTO-ENGINEERING TC23036 and finally the retro-illuminator is an OPTO-ENGINEERING LTCLHP036-R (red light). In this set-up a spot was also dedicated to the calibration master required for the calibration of the camera.
The acquisitions obtained have some differences according to the use of the the retro-illuminator. Fig. 7, 8 and 9 show some examples of the acquisitions conducted.
Finally, the measured object was then compared to the tomography obtained from a selected company, resulting in the error map in Fig. 10.


Fig. 6 - 2D experimental set-up.
Fig. 10 - Error map obtained comparing the measured object to the tomography.

If you are interested in the project and want to read more about the procedure carried out in this thesis work, as well as the resulting measurments, download the presentation below.

OpenPTrack software metrological evaluation

Smart tracking systems are nowadays a necessity in different fields, especially the industrial one. A very interesting and successful open source software has been developed by the University of Padua, called OpenPTrack. The software, based on ROS (Robotic Operative System), is capable to keep track of humans in the scene, leveraging well known tracking algorithms that use point cloud 3D information, and also objects, leveraging the colour information as well.

Amazed by the capabilites of the software, we decided to study its performances further. This is the aim of this thesis project: to carefully characterize the measurment performances of OpenPTrack both of humans and objects, by using a set of Kinect v2 sensor.

Step 1: Calibration of the sensors

It is of utmost importance to correctly calibrate the sensors when performing a multi-sensor acquisition. 

Two types of calibration are necessary: (i) the intrinsic calibration, to align the colour (or grayscale/IR like in the case of OpenPTrack) information acquired to the depth information (Fig. 1) and (ii) the extrinsic calibration, to align the different views obtained by the different cameras to a common reference system (Fig. 2).

The software provides the suitable tools to perform these steps, and also provides a tool to further refine the extrinsic calibration obtained (Fig. 3). In this case, a human operator has to walk around the scene: its trajectory is then acquired by every sensor and at the end of this registration the procedure aligns the trajectories in a more precise way.

Each of these calibration processes is completely automatic and performed by the software.

Fig. 1 - Examples of intrinsic calibration images. (a) RGB hd image, (b) IR image, (c) syncronized calibration of RGB and IR streams.
Fig. 2 - Scheme of an extrinsic calibration procedure. The second camera K2 must be referred to the first on K1, finally the two must be referred to an absolute reference system called Wd.
Fig. 3 - Examples of the calibration refinement. (a) Trajectories obtained by two Kinect not refined, (b) trajectories correctly aligned after the refinement procedure.

Step 2: Definition of measurment area

Two Kinect v2 were used for the project, mounted on tripods and placed in order to acquire the larger FoV possible (Fig. 4). A total of 31 positions were defined in the area: these are the spots where the targets to be measured have been placed in the two experiments, in order to cover all the FoV available. Note that not every spot lies in a region acquired by both Kinects, and that there are 3 performance regions highlighted in the figure: the overall most performing one (light green) and the single camera most performing ones, where only one camera (the one that is closer) sees the target with a good performance.

Fig. 4 - FoV acquired by the two Kinects. The numbers represent the different acquisition positions (31 in total) where the targets where placed in order to perform a stable acquisition and characterization of the measurment.

Step 3: Evaluation of Human Detection Algorithms

To evaluate the detection algorithms of OpenPTrack it has been used a mannequin placed firmly on the different spots as the measuring target. Its orientation is different for every acquisition (N, S, W, E) in order to better understand if the algorithm is able to correctly detect the barycenter of the mannequin even if it is rotated (Fig. 5).
 

The performances were evaluated using 4 parameters:

  • MOTA (Multiple Object Tracking Accuracy), to measure if the algorithm was able to detect the human in the scene;
  • MOTP (Multiple Object Tracking Precision), to measure the accuracy of the barycenter estimation relative to the human figure;
  • (Ex, Ey, Ez), the mean error between the estimation of the barycenter position and the reference barycenter position known, relative to every spatial dimension (x, y, z);
  • (Sx, Sy, Sz), the errors variability to measure the repetibility of the measurments for every spatial dimension (x, y, z).
Fig. 5 - Different orientations of the mannequin in the same spot.

Step 4: Evaluation of Object Detection algorithms

A different target has been used to evaluate the performances of Object Detection algorithms, shown in Fig. 6: it is a structure on which three spheres have been positioned on top of three rigid arms. The spheres are of different colours (R, G, B), to estimate how much the algorithm is colour-dependant, and different dimensions (200 mm, 160 mm, 100 mm), to estimante how much the algorithm is dimension-dependant. In this case, to estimate the performances of the algorithm the relative position between the spheres has been used as the reference measure (Fig. 7). 
 

The performances were evaluated using the same parameters used for the Human Detection algorithm, but referred to the tracked object instead. 

Fig. 6 - The different targets: in the first three images the spheres are of different colours but same dimension (200 mm, 160 mm and 100 mm), while in the last figure the sphere where all of the same colour (green) but of different dimensions.
Fig. 7 - Example of the reference positions of the spheres used.

If you want to know more about the project and the results obtained, please download the master thesis below.

JUST GIVE ME A MEASUREMENT

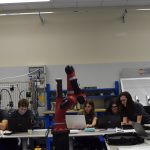
From 20th January to 2nd February the MMT Laboratory of Brescia’s University hosted eight students from the fourth year of Iseo and Salò’s secondary schools during the internship with the purpose to teach new technical and scientific knowledges and give the opportunity to elaborate publicity materials that broadcast the SI redefinition.
The new measurement system is no longer based on platinum alloys samples, which have been deteriorated with the passage of time, but is founded on universal constants that, by their own definition, will be the same despite of time.
Consider for example the metre, which corresponded to the length of a platinum-iridium bar, held in Paris at the Bureau International des Poids et Mesures (BIPM), i.e. the international Office of Weights and Measures. Today the unit of measurement of the length is defined by the distance travelled by the light in the vacuum in a given time interval.
In addition, in the laboratory, the students attended the exhibition of theses and projects prepared by Professor Lancini’s pupils and lessons on the definitions of estimate and uncertainty. On the other, the students visited several laboratories and participated in the repeatability test of muscle reaction.
In this way, the boys had the opportunity to deepen the engineering field and enrich their scientific training in the direction of a course of future studies.

COSTANTLY UPDATED

From 21st January to 2nd February the Laboratory of Mechanical and Thermal Measurement of the University of Brescia will be hosting 8 students from the scientific secondary schools of Iseo and Salò for an internship focused on the recent redefinition of SI base units, supervised by the manager of the laboratory, Professor Matteo Lancini.

In the program, students learn about of the projects of the laboratory, participate to experiments, collect and analyze data and defines the concepts of estimation, uncertainty and repeatability.
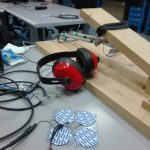
The techniques of basic metrology are used to operate with data of experiments of calibration of load cell and LVDT, measurement of repeatability and position of cobot Sawyer and the study of the times of reaction and movement of the arm, obtained by a system of EMG and potentiometers, made by the students of the laboratory.
The analysis of the results permits to comprehend the meaning of the uncertainty as indicator of dispersion essential to connect probability and distance from estimation, and discredit the error theory, outdated in the scientific field, but still taught in secondary schools.
The studies on the uncertainty show the reasons of a necessary redefinition of the International System: for centuries the units were defined as quantities of objects that depend on stability of the prototype in time and which values are known with an uncertainty.
To overcome this problem, scientists tried to define all the units in reference to constants, and not to objects, obtaining in this way benefits in terms of consistency, stability and accuracy.
After the 1960 and 1983 Metre Convention, the mass remained the only fundamental quantity to have a physical prototype as a unit of measurement and be subjected to uncertainty of calibration and instability.
Only with the General Conference on Weights and Measures of November 16, 2018, the kilogram was redefined with physical constants.
The new definition of kilogram is realised thanks to the interdependence between the quantities of the SI; it reduces the uncertainty and permits getting more reliable and economical measurements concerning mass, strength and energy. This is a real revolution in scientific, pharmaceutical and industrial fields, which also makes the SI more democratic and accessible.

STUDENTS, THE FIRST TO BE INFORMED!

On 20th May 2019 the scientific world will go through a revolution: after years of working, the SI will redefine the kilogram in function of a set of universal constants. The kilogram is the last unit of measurement that was still defined by the prototype conserved by the BIPM.
This change will not affect daily life (“a kilo of apples will remain a kilo of apples”), but the youth, who study scientific subjects, must know this great change. So, how can this news spread in schools? The bureaucratic procedures will take much time, so students could have access to updated textbooks in schools only in few years. However, we can do something meanwhile…
The MMT Laboratory of UNIBS, coordinated by professor Lancini, is hosting 8 students from secondary schools “IIS Antonietti” from Iseo and “Liceo Fermi” from Salò. The students have received this opportunity thanks to the “Alternanza Scuola-Lavoro” national internship project.
In this week, pupils had theoretical lessons with the teacher, studying metrological and statistical topics, such as calibration, repeatability and uncertainty. The professor has used a clear language which all students that attend the 4th year in a scientific Liceo can understand.

Between activities, the students have visited many university’s laboratories. They have seen other machines and engineering techniques, and found out how a researcher works, that isn’t a clear idea for the people that do not know anything about the universities.
Next week, students are producing educational materials about the SI and its redefinition, as posters, presentations or videos, to share them in secondary schools.