In this page, the application of the method to the case of nasal prosthetic reconstruction is shown. The patient suffered from a total loss of the nose, because of excision of a tumor. The optical 3D laser stripe digitizer Konica Minolta Vivid 910 was used to perform data acquisition. The system was mounted on a tripod and properly oriented to optimize the acquisition view point, as shown in Fig. 1. The whole face was scanned by a eye-safe laser stripe in 0.3 seconds. The corresponding point cloud is shown in Fig. 2.
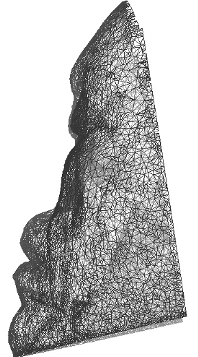
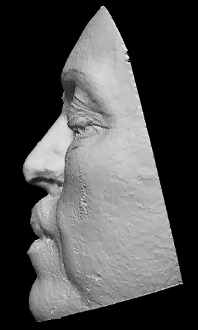
By means of suitable tessellation, the raw 3D data point were replaced by triangle tessels that maintained the information about the contiguity of the points. The polygon mesh is shown in Fig. 3. A 4 mm thickness was then internally added. The mesh was then saved in a 9 MB STL file, for subsequent prototyping.
The “sculpured model” of the patient’s face was created. To this aim, a number of healthy “donors” were engaged. The Minolta digitizer was used to acquire at the best resolution the point cloud of their nose. Each mesh was dragged and roughly matched to the reference model, to visually appreciate the appearance of the whole face, and to select the most appealing shape, under the aesthetical point of view. After it was selected, it was carefully positioned onto the reference model. The boundaries were refined and finely blended to the deformity site, to optimize the functionality and the proportions of the prosthesis. The resulting sculpured model is shown in Fig. 4. A 4 mm thickness was externally added, the mesh was then saved in a 11.3 MB STL file.
Then, the physical models were created. Both the STL files were sent through the internet for the RP machining. They were fabricated using the epoxy photo-polymerizing resin “Somos Watershed 11120” by the SLA 3500 Prototyping Machine. The RP production was accomplished in about 14 hours. The two physical models are shown in Fig. 5.
The last step was the fabrication of the prosthesis. The conventional wax positive pattern was cast. To perform this task, the two physical models were physically overlapped one to the other and the wax was poured as shown in Fig. 6. The wax pattern was then positioned on the prototype of the reference model as shown in Fig. 7. In this way, it was possible to perform the try-in of the prosthesis and its refinement on this copy, without disturbing the patient. The definitive prosthesis was obtained by conventional flasking and investing procedures. Fig. 8 shows the patient after the positioning of the prosthesis. It was then manually refined on the patient’s face, to match the skin color and texture. This operation was possible thanks to the collaboration with the medical team of the Faculty of Medicine of the University of Brescia and the precious contribution of Dr. Vincenzo Cavallari, technical specialist in facial and dental implants.


